 Before I started drilling holes, I did a bit of research on how others had done it, namely drilling holes in the angle iron or into the front and back sides of the saw’s cast iron top. While many had drilled into the angle iron, I was concerned about revoking the 2 year warranty, and also realized my little bench top drill press was not up to the task of drilling. I decided it would be much safer to attempt to drill into the cast iron.
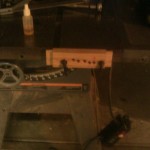
While I did not come to the decision of drilling through a 1/4″ of cast iron lightly, I figured I could use a jig to more accurately and more safely get the holes I needed. The other benefit was I was able to use the specialized screws that came with the fence for a more solid fit. I made a drilling guide using a scrap piece of hardwood, the width being about 1.5″, which matched the width of front and back of the saw. I marked as best I could where the hole should be on the guide, and drilled the guide hole using the drill press. From there I used trial and error until I was able to drill a hole that I could stick a bolt through to a whole in the saw, and the tops would be flush. You can see in the picture where I marked the successful one. I then lined up the hole to the red mark on the table and clamped it down good and tight. You will also note in the picture the bottle of machine oil. I coated the drill bit with the oil before I started to drilling, and several times during drilling.
 Finally, after taking a good deep breath, I started to drill. The first hole took about 5 minutes to cut through. Now, this is the first time I have drilled through cast iron. I was therefore taken by quite the surprise when the drill bit finally cut all the way through, and instead of sliding through like drilling into wood, the bit caught in the cast iron, yanking the drill out my hands. I was very fortunate that I did not get hit by anything, and nor did the drill or bit break in this process. The second hole I drilled took quite a bit longer to drill as I did not want this to happen again, with potentially more disastrous results. I did discover that just before the drill bit broke through there is a lot more vibration as a warning to slow way down and therefore was able to drill through this time without incident.
For the back rail, I decided it was best to use one existing hole and only have to drill one more hole. With the difference being only one inch I was not really losing anything by having both rails being lined up. The third and final hole I was able to drill the quickest, and was able to drill through without incident.
