
Before I get started, I want to put out a big THANK YOU to Jason Beam. He has provided an absolute wealth of information and inspiration to help start to make this project a reality for me!
This is likely going to be one of the most complex projects I have undertaken to date. However, the process to build this project is the same as any other project. Every complex project is broken down to individual tasks and challenges to be solved. Some will take more time and effort than others. Like any woodworking project, this build is done one step at a time, until the end result is a working CNC router. Something I am doing a little different with this build, as I am using Microsoft Onenote to keep track of the various aspects of the build. Everything from part specs, to the number of screws needed. This is going to help keep my head straight as I move along on this project. It will also help provide some of foundation for future posts too!
The first thing I needed to determine, was how big of a CNC router did I want. First I have to be realistic, as much as I would love to have a large machine, I simply don’t have the room for one that is too big. So the first decision I made was an approximate size machine I wanted. In my case, I am looking to build one that is approximately 3’x2′. While it is not real large, looking at the types of projects I often take on, I don’t do a lot with sheet goods, and I don’t typically have work pieces that exceed that size, so this really should be sufficient to my needs. With the size determined, I can start the real planning.
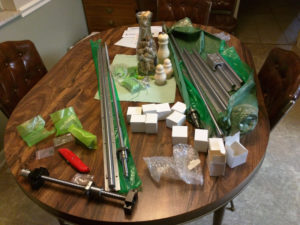
Before I can really start designing the machine, I need to determine how the router is going to move. This took a significant amount of research, as honestly I had no clue where to start, and if the was even feasible for me. Think back to your geometry and algebra classes, a CNC works on the X, Y, and Z planes. Each direction direction or plane is referred to as an axis. All CNC routers have at least 3 axes, which is what I am building. More complex machines can have more than 3, but for now that is more advanced then what I am willing to take on. With getting each axis to move, it is imperative that they move in a stable, and precise manner, while supporting the weight of the router, gantry and other moving parts. This actually is a lot of mass to move. Any extra movement results in reduction in precision of the machine. A few basic Google searches reveal many solutions to accomplish this, from home grown options to various rail and screw systems, each with its own pros and cons. With the help of Jason and his wisdom, I did go with a more premium option, with using SBR20 linear rails. I was able to save quite a bit of money by ordering a rail and screw kit through a company that works through eBay. The kit I ordered came in very close to the size I was looking for, and included all the mechanical elements needed to make this move well. This includes the SBR20 linear rails, the linear blocks, C7 ball screws, and all the needed mounting hardware. These parts are heavy duty, and will help form a strong foundation for my machine.
It may seem a little backwards to start buying parts before drawing up any plans. However, there is a method to my madness here. Right now I have several mental images of how I want this to look. Beyond that, I really needed to see how the rails and screws are put together. This will allow me to move them around on the floor, and get measurements from them. This will allow me to start drawing up the designs in Sketch Up.
My next few posts will go into further details of planning and design. In the meantime, feel free to post any questions in the comments, and I will answer them with the best of my ability. Till next time, happy and safe woodworking!