Hand Plane – Edge Jointing Adventures!

Published on by Mike  (1 Comment)

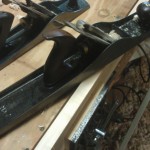
So, I have been making much more of shift to hand tool usage then I ever thought I would.  This was quite evident this past weekend when I pulled out my 100+year old Stanley Bailey #7 jointer plane.  My goal is to glue up 3 four foot long rough sawn boards so that I can a board wide enough for my current project.  Typically when setting up a glue joint, the best thing to do is send the piece over the jointer.  Unfortunately, the beds on my jointer (small bench top machine) are way too short to joint a 4 foot long board.  With a lot of messing around with stands I can make it work.  I bought the #7 jointer plane as an alternative to using the jointer.   The process I used below are mostly what I figured out using trial and error, and may or may not be considered best practices.  However, that is the great thing about woodworking, there are so many different ways to accomplish a given task!

Challenge #1 – Getting a straight edge

This is what the jointer plane is made for.  It does a great job at smoothing the edge, and making it straight.  Just like on the jointer, a few passes is typically enough to get the rough sawn edge smooth.  The length of the #7 (around 20inches) is what gets the edge straight.  As I progressed through the first board I worked on, there were several lessons I learned.  First, pushing a large jointer plane is a great work out!  This is a heavy plane, being pushed over a fairly good distance.  Next, the first indicator that the edge is becoming straight is visual.  The rough material will start to disappear leaving a smooth surface.  The second indicator is to listen.  When pushing the hand plane it is possible to hear when the blade is cutting or not.  When it is not cutting, that is an indication that there is a valley.  Once you can hear a non-stop cut, the board should be pretty straight.  Finally, check it with a straight edge.  The piece should be straight.

Challenge #2 – Getting the edge square to a face
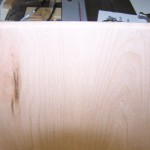
My delight of getting a straight edge was quickly turned into frustration when I took a square to checked the edge in relation to one of the faces, and it was no where near square.  Still being new to hand planes, I wasn’t quite sure what to do to fix this.  My first instinct was to simply tip the plane to start trying to bring down the high side.  I found this made thing worse.  As I started thinking through the issue, and with some help from the TWW chatroom (Thank you Roger!)  I realized that the various adjustments on the plane are for more then just making sure the blade is properly placed in the plane.  Frequent adjustments of both the depth wheel and lateral adjustment handle is what gets a good square edge.   When starting out with a rough piece, an aggressive cut is desired. However, pulling back the blade a bit helps quite a bit with making adjustments to the cut angle.  After several LIGHT passes, I check the edge with my square.  If I see a gap, its not square.  To deal with this, I lightly push the lateral adjustment lever slightly towards the side of the gap.  Making small changes is key here..  Keep repeating this process until the edge shows to be square.  I found that it is also good to check for square along multiple points along the board.  Make light cuts and check for square often.  Finally I found it is worthwhile to clamp the faces of the two boards that are going to be glued together, and make a couple light passes on the edges to be glued together.  This should make sure that a good solid glue-up for the boards.

Conclusion
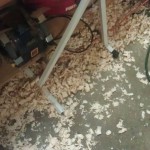
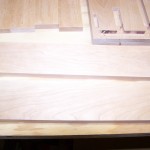
So after spending many hours playing with my plane, and creating a mountain of shavings, I finally achieved a couple straight and square edges that are ready for glue-up

Handcut Dovetails

Published on by Mike  (Leave a comment)

Book-ends 1 through 4
Dovetail Progress Book-ends 1 through 4

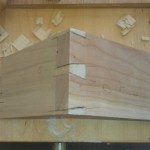
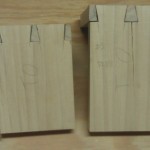
As I posted a few weeks ago, I attended a dovetail class taught at the local Woodcraft by the owner.  Since then I have been working on a few practice pieces to start getting the feel for cutting them.  The last practice piece I was working on ended with the best dovetail joint so f

ar.  The gaps are minimal, the fit is solid so that there is no play, and best of all, the two pieces are completely square to each other!  It was an incredible feeling knowing that I accomplished that using nothing but hand tools!

Now, if you talked to me a couple of years ago, I would have laughed at the thought of using hand tools, much less attempting cutting dovetails by hand.  First let me say, if I can do it, you can to!  The biggest thing I have learned, is not to rush!  That, and making sure all the tools being used are sharp and ready to go!  I know there are some videos out there that shows someone making a near perfect dovetail joint in

less than 10 minutes.  The last one I did took me over an hour to do.  While I have found myself getting naturally faster at some of the steps, speed is not the focus here.  The focus is trying to make a good clean dovetail, taking one step at a time.

I have decided that the next project I work will incorporate dovetails.  I will be sure to document it on my blog as progress through that.

Handcut Dovetail Class

Published on by Mike  (Leave a comment)

Today I took a class at the local woodcraft on cutting hand cut dovetail.  I had tried cutting dovetails on my own with less than desirable results.  Admittedly I had tried with a dozuki, and I never could get a good feel for that saw.  For this class, I decided to bite the bullet and buy a Veritas 14TPI dovetail saw, which I used today.  It was money well spent!  With a few minor exceptions, even though they had their tools out for us to use, I used my own tools.  This was important to me as these would be the tools I would be using in my shop, I would be using to learn with.

The class was three hours long, but by the end of the class, I had made a solid joint.  The gaps, while there, are small, and with some additional practice, I feel I am on the way to make solid dovetails!  The photo shows the end results of today’s class.

Table Saw Guide Part 2 – Choosing the right saw

Published on by Mike  (Leave a comment)

This is can be topic of huge debate, and has been discussed many times over.  Reading through the various woodworking forums and chatrooms, I see reoccurring themes along the lines of “You get what you pay for” and “I can’t afford to buy cheap tools!”  While I don’t disagree with these statements, I have noticed that a lot of those who say that tend to own very high end tools that sell for top dollar.  The reality is that most people starting out with woodworking as a hobby would run away screaming if they saw how much some of those machines sell for.  On the other end of the spectrum I have seen more than once, myself included in this, where a low end machine is purchase and a high degree of frustration due to the machine not performing as expected.

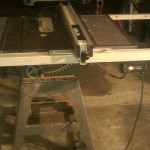
However, I do believe that was proper planning and research, the right table saw can be found for your needs.  With my conversations with others, I often hear “I am just starting out so I don’t want to start out with something too expensive” or “I am just a beginner, I am going to get a cheap machine.”  I shudder a little bit every time I hear something like that.  Instead of looking at your current skill, look at the skill level you want to achieve.  Next think about what you will be primarily using  the table saw for.  For example, is it primarily going to be used for repairs around the house, building furniture, or even going into more fine woodworking.  Next look at your power availability.  Many higher end table saws require 220 volt outlets.   This may or may not be a big cost depending on the location of the circuit panel, and the number of open slots.  If it is not feasible, there are still many good table saws that run off of 110.  Finally, (and this was intentionally left for last) your budget.  It is very tempting to to put budget first, but the issue is that you may end up buying too much or not enough of a machine to meet your needs.  If you determine that you need a higher end machine but have a limited budget, perhaps waiting a little longer to save more for the machine you need, or looking at used saws.  I personally use an old table saw I bought used via Craigslist, and while I made some upgrades to it, has proven to be a very good saw for my needs, and didn’t bust any budgets.

So, the question remains what table saw is best to buy.  When walking through your big box stores you see a lot of the bench top/job site table saws.  If you are doing anything other than home construction and/or repair, I would stay away from them.  Based on my experience from owning one myself, at first, you will have a decent saw.  Can you learn from this type of saw? Yes absolutely.  In fact I have seen where some old timers use these saws and do beautiful work  on them.  However, it does take a considerable amount of patience with these saws to achieve this.  The issue is the materials used to make these saws just do not hold up well over time.  The trunnions are thin aluminum, the table is cast aluminum, and the body is made from plastic.  With my old saw I was constantly fighting it to keep everything square.  What finally did it in for me is the table itself went out of flat, which made getting the blade square to the table near impossible.  For furniture and fine woodworking, this makes it very hard to use this saw well.    If you are planning on making this a serious hobby, possibly planning doing some commission work then I would start looking at the high end of table saws.  Look at the high end hybrid or even cabinet saws  You will want a machine that keeps up with your demand.  For folks, such as myself, who are primarily weekend warrior woodworkers, look at the contractor and hybrid saws.  Any of these saws, which come with either cast iron or granite tops, well allow you to achieve a much finer degree of woodworking.  Obviously the higher you go on machine quality the better cut you will get.

Lastly, whatever table saw you decide to buy, along with it, buy a good blade.  The blades that come with table saws are awful.  They aren’t very sharp and will dull pretty quickly, which will leave you with a poor quality cut.  A crappy blade will even make the best table saw perform crappy.

Chisel Collection Update & Current Project

Published on by Mike  (Leave a comment)

I know it has been awhile since I last updated, but I have been busy make sawdust!!  I am happy to say that the chisel collection is now complete!  The last picture you saw, there were only 3 chisels.  I am happy to say I now have the complete set at 11 chisels!    There were a couple of factors into why I opted to get the complete set.  The biggest factor is cost.  The local woodcraft had a 25% off sale for all chisels, which started AFTER I bought the first 3 pictured in the earlier post.  Except for those 3, I was able to take advantage of that sale for the remaining chisels.  Thankfully the sale ran for awhile!  The other reason was after some coaxing from a few people on TheWoodWhisperer.com chat room (you know who you are) they convinced me it is better to have them all and use them occasionally, and not have it and need it.  Surprising, I have found I have used all the chisels, fairly frequently while working on the current project, which has had a lot of hand work on it.  Fyi, the chisel have been great, I would give them a 5 star rating.

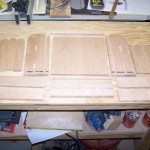
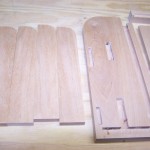
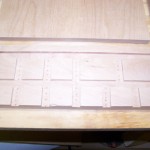
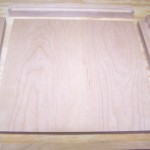
The project I am working on is a storage rack for the chisels.  This started out with a drawing I made in sketch-up.  From the sketch-up drawins, I estimated the amount of wood I would need.  I ended up buying 7 board feet of cherry for the rack.  This was 2 more than I figured I would need, however I ended up using ever bit of it!  Most of the longer dados were done on the router table.  A lot of them were stopped short, and the squared up with my chisels.  The short dados on the bottom piece were done largely by hand with the only power tool being the drill press to hog out most of the material.  All the mortises were done by hand, again using the drill press to hog out much of the material.  The back panel is a glue up of two smaller boards.  I had the foresight to glue them together at 3/4″ thick, and let them acclimate awhile.  Sure enough, I got warpage.  I used, for the first time, my jack plane to get the wobble out, then planed it down to the 1/2″ thickness.  The pictures below are all the parts needed to assemble the rack.  Each piece has been sanded to 220.  The next step is assembly, which as of this posting is not done yet. I will make a future post of the assembled rack.