New Table Saw Fence – Part 3 – This is only a drill!

Published on by Mike  (Leave a comment)

drill_jigBefore I started drilling holes, I did a bit of research on how others had done it, namely drilling holes in the angle iron or into the front and back sides of the saw’s cast iron top.  While many had drilled into the angle iron, I was concerned about revoking the 2 year warranty, and also realized my little bench top drill press was not up to the task of drilling.  I decided it would be much safer to attempt to drill into the cast iron.

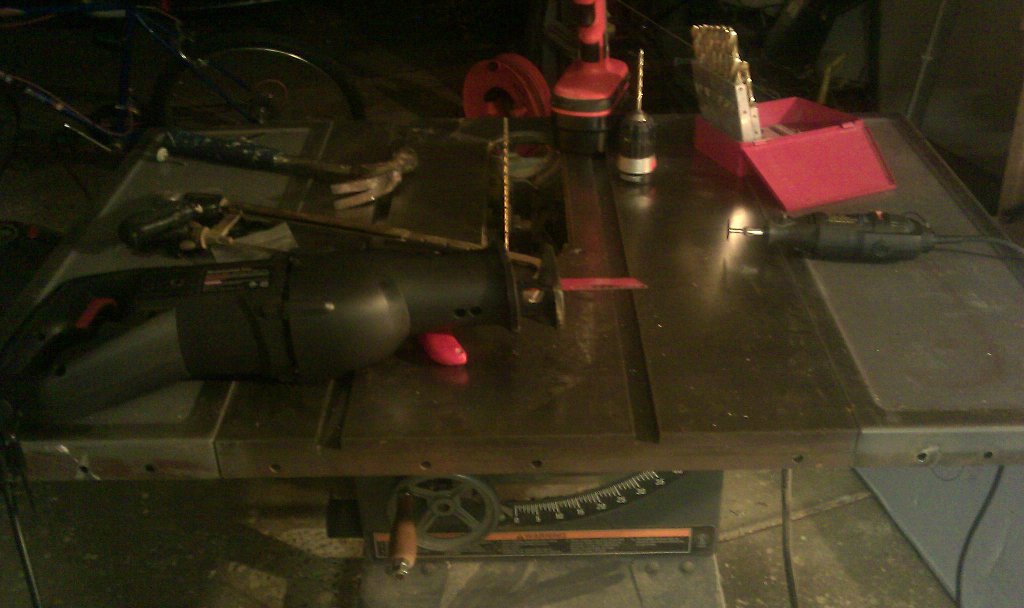
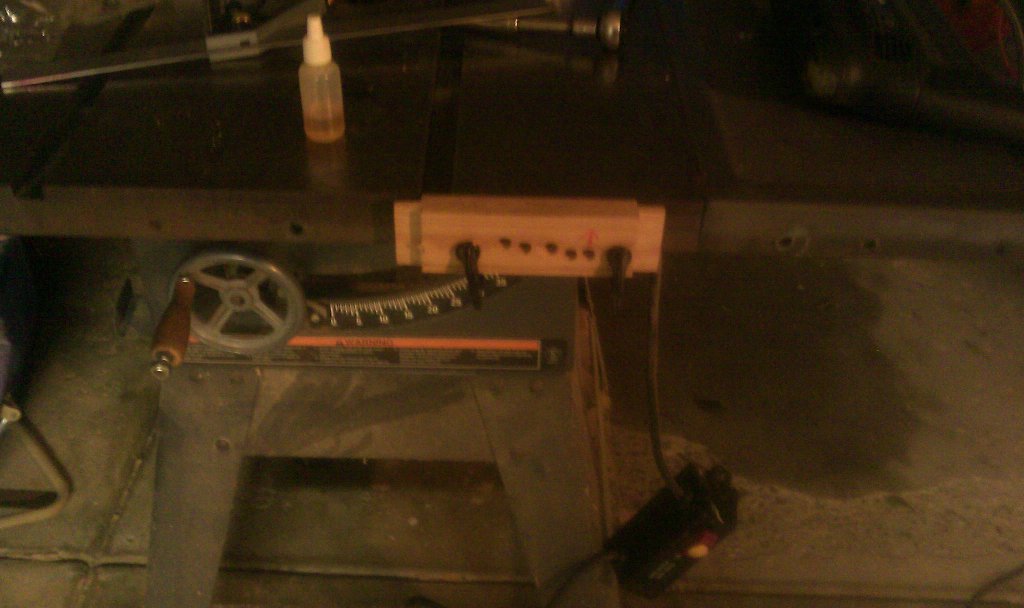
While I did not come to the decision of drilling through a 1/4″ of cast iron lightly, I figured I could use a jig to more accurately and more safely get the holes I needed. The other benefit was I was able to use the specialized screws that came with the fence for a more solid fit. I made a drilling guide using a scrap piece of hardwood, the width being about 1.5″, which matched the width of front and back of the saw. I marked as best I could where the hole should be on the guide, and drilled the guide hole using the drill press. From there I used trial and error until I was able to drill a hole that I could stick a bolt through to a whole in the saw, and the tops would be flush. You can see in the picture where I marked the successful one. I then lined up the hole to the red mark on the table and clamped it down good and tight. You will also note in the picture the bottle of machine oil. I coated the drill bit with the oil before I started to drilling, and several times during drilling.

new_holeFinally, after taking a good deep breath, I started to drill. The first hole took about 5 minutes to cut through. Now, this is the first time I have drilled through cast iron. I was therefore taken by quite the surprise when the drill bit finally cut all the way through, and instead of sliding through like drilling into wood, the bit caught in the cast iron, yanking the drill out my hands. I was very fortunate that I did not get hit by anything, and nor did the drill or bit break in this process. The second hole I drilled took quite a bit longer to drill as I did not want this to happen again, with potentially more disastrous results. I did discover that just before the drill bit broke through there is a lot more vibration as a warning to slow way down and therefore was able to drill through this time without incident.

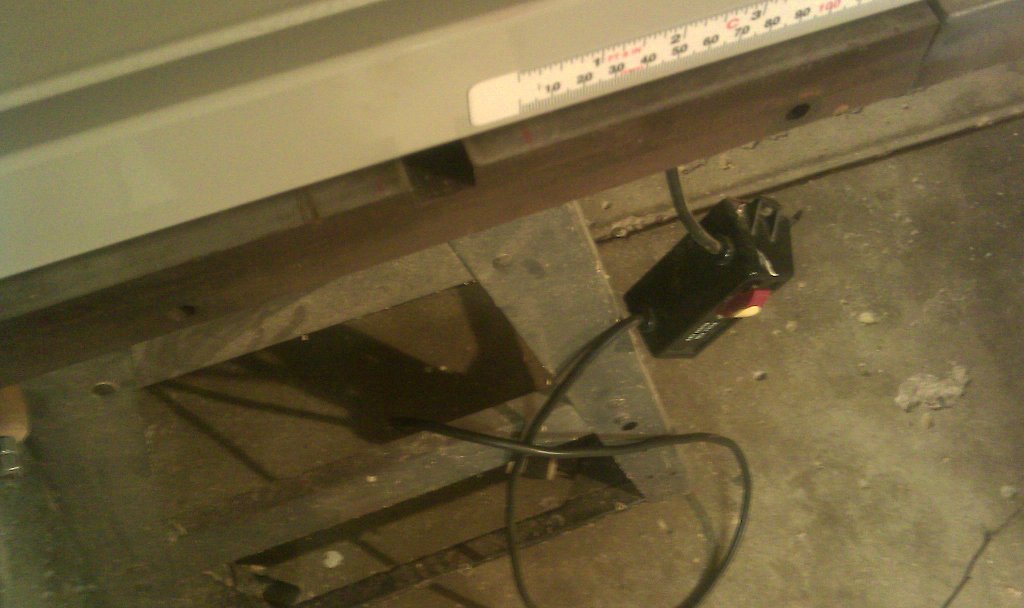
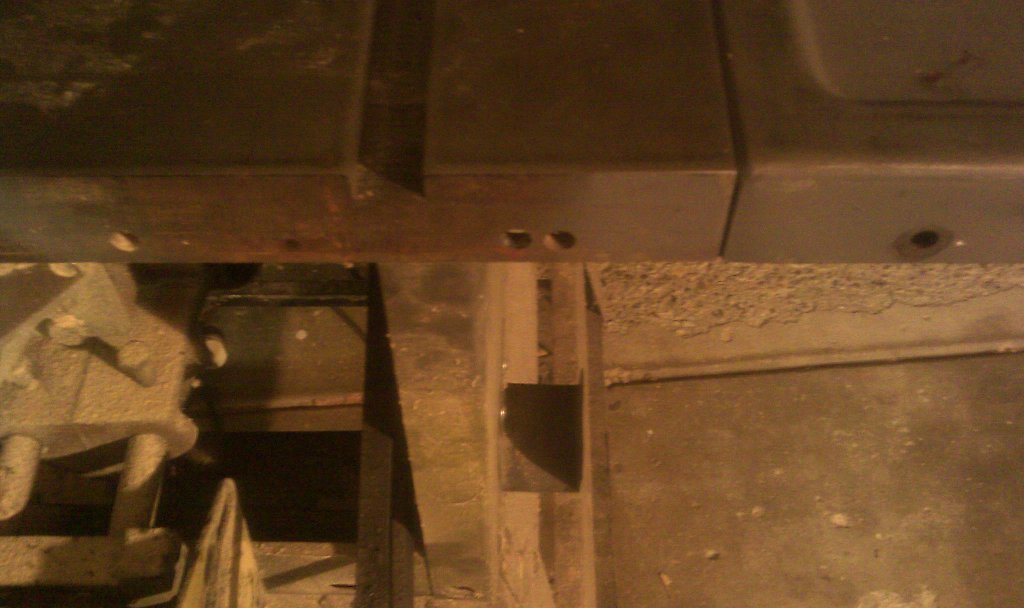
For the back rail, I decided it was best to use one existing hole and only have to drill one more hole. With the difference being only one inch I was not really losing anything by having both rails being lined up. The third and final hole I was able to drill the quickest, and was able to drill through without incident.

New Table Saw Fence – Part 2 – Demolition & Planning

Published on by Mike  (Leave a comment)

old_rails_goneBefore I could start the install I had to remove the old fence. Despite the bolts for the old fence rails being a little rusty, they came out fairly easily. I found however that the wings had bolts that had rounded heads that needed to come out as well, otherwise the angle irons for the new fence would not be able to sit flush to the TS. Out 9 of these bolts 1 came out easily. Using some WD-40 and slotting the bolt heads with the dremel, I was able to get 6 more out. The last two….. Well they were a bit stubborn. The picture speaks for itself as to what it took to get those suckers out. (Fear not, none of theses tools were used anywhere near the cast iron table…. yet)

new_fence_planningAt this point, if this had been a Delta table saw, this fence would have very easily bolted up to the saw. However, since the saw is a Craftsman, none of the holes in the saw lined up with the holes in the angle iron. I could potentially use the closest matching hole, but the tape measure would be about an inch off. Therefore I needed to drill a few new holes, I just needed to figure out where. First thing I did was raise the blade up so that it was taller than the new fence, and placed the fence right against the blade. Looking at the indicator line on the fence indicated approximately  where there rail needed to lined up so zero would be within the adjustment zone of the scale. I marked the position on the saw using a red china pen.  Next I screwed the tube rail to the angle iron, and then aligned the zero point to the red mark on the saw.  From there I was able to mark the hole positions in the table saw top based off the positions in the angle iron.  I then knew where I needed to drill.

New Table Saw Fence – Part 1

Published on by Mike  (Leave a comment)

Back in September of 2010, before I had even thought of starting a blog, I did a write up on one of the woodworking forums about installing the Delta T-2 Fence on my Craftsman Contractor saw.  With what I am trying to accomplish on my Blog, I thought it would be relevant to repost it here.   I have revised and cleaned up each post so that it fits better in a blog setting, as well as make the dates and timelines appropriate.  The photos are not the best, and often dark.  Since I did this install, I have gotten a better camera and the lighting in the garage/shop area has been improved.

Originally Posted On September 7th, 2010

As mentioned in the safety thread, I ordered a Delta T2 36-T30 fence system for my 25 year old Craftsman Contractor saw. I bought a Craftsman Contractor table saw for $100 via craigslist earlier in 2010, and overall was happy with the saw, except the fence was stock as it was shot. (please note, I had no expectations at getting an older table saw with a good fence at the time of purchase) As much as I would have liked a Biesemeyer or Incra fence, the T2 @ $155 (that is including shipping) it seemed liked a smart purchase for the saw.

I am breaking this down across multiple posts so that I can better show and explain the overall process, especially since there is a few challenges to installing a Delta fence to Craftsman table saw.

The first picture is the before picture. As you can see the fence would only go right of the blade. Honestly it wasn’t that big of a limitation, but there are times when having the fence to the left of the blade is useful. Also the power switch points down towards the floor, which can make it hard to get to when trying to turn the saw off. The second picture has all the T2 Fence parts laid out for inspection.

original_fence new_fence_unboxed

The Woodworking Shows and Tool Gloat!

Published on by Mike  (Leave a comment)

As you may or may not have noticed, but I am attempting to do more posts, and doing one at least weekly.  This week, there are two posts!  This past weekend, I attended The Woodworking Shows in Columbus Ohio.  I must say, I had a blast!  This was the first time I attended one of these shows.  This show is mainly about the vendor booths, but there were also some excellent presentations as well.  I watched presentations by Paul Moore, also known as The Crazy Woodworking Canadian.  He showed off some techniques and products, but was popping jokes left and right and had the audience rolling.  I see the same theme coming up at this show as I do at other shows, which is the growth in hand tools.  I watched a presentation by Paul Sellers, who is a very talented woodworking.  What he did with hand tools in a very short period of team puts most of us to shame when using power tools.  Andy Chidwick and Chuck Bender also put on a great presentation as well.

Something that was great about both days I went to the show was meeting up with people.  The first day, I brought my Dad up with me.  While he has an appreciation of the craft and the tools that go in to them, he isn’t into woodworking to the degree I am.  Still, we both really enjoyed the time together.  The next day, I met up with Kevin and ran into Sean, both of whom I have had some conversations with online.  It is always great to put a real face on those we talk to online!

2013-03-04 20.27.54Finally the tool gloat.  🙂  There were a lot of good deals at the show.  After walking around the show a bit, I started making me purchase strategy, which includes the okay from the boss (aka the wife!).  Some of my smaller purchases came from the far back corner of the show where there was a tool closeout area.  There was a lot of junk there, but a few gems with in2013-03-04 20.03.34 the junk.  It was priced so cheaply it was worth the risk on some of it.  First off, I bought 4 calipers for the lathe, at $3 a piece.  I also got 3 boxes of sand paper for my random orbit sander, also at $3 each.  Finally, I bought a file for $2.  For my big purchase I bought more clamps.  I ended up going with four 18″ Bessey Revos, for under $140!

All-in-all it was a great weekend!!


A few updates and tool gloats

Published on by Mike  (2 Comments)

Hey All, I know its been a long time since I have put an update to the blog.  The good news is things have been happening, I just haven’t been very proactive at updating the blog.  I do have part 2 of the Technology in the Shop article nearly complete, just needs some final touches.  If you would like to see more articles like that from me, please leave feedback on what you would like to see.

2012-12-06 20.48.432012-12-15 19.31.48Despite the lack of updates, I have been busy in the shop, largely spending time at the lathe turning Christmas ornaments for family and friends.  This year I tried turning miniature acorn bird houses.  These were a lot of fun to turn!  I am also participating in another challenge from the chatroom on The Woodwhisperer.com website.  This time it is a box.  I will update the blog once it has been completed.  The hand tool cabinet hasn’t changed much since its last post, that may have to wait till Spring before I work on it again.

2012-11-08 18.17.16Finally, a couple tool gloats.  First back in November, I went to the Woodworking in America show near Cincinnati.  While I took advantage of a number of good deals, my main purchase was a Veritas Router Plane.  I must say, it is a very well made hand plane, and I will likely be buying the smaller blades for it as well.


2012-12-25 18.14.47The second gloat, is for Christmas my family got me the Ridgid Oscillating Sander.  This thing is great is at doubles both a spindle and belt sander, and really excels at smoothing cuts from the bandsaw, both inside and outside curves.

I will try to do a bit better with getting blog posts up.  One thing that helps motivate me to do more blog posts is feedback!  Let me know what you think!