I know I said back when I did the video of the drawers I was going to do another follow-up video. I will be honest, in many ways, I felt that video is a bit of a disaster, so much that video prompted me to retool my video production capabilities a bit. However, I am ready to move on to other projects and videos, so I decided to finish up the drawers without the eye of the video camera.
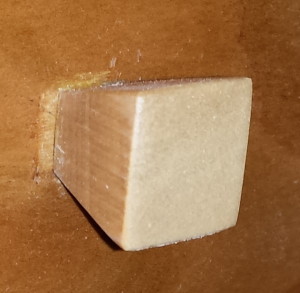 The first thing I worked on was the pulls. I went through several design ideas, including sometime on the lathe, band saw, and shaping with hand tools. In the end I went with simple square pulls that taper inward. I did this by ripping a couple of strips of maple on the band saw, with the table set at 15 degrees. Keeping the fence and table in the same position, I crosscut each strip to the square pulls. I sanded them down thoroughly, and glued them on to the drawers. After the glue dried, I put a good coat of boiled linseed oil on each drawer. I let them sit and cure for a week. I then sprayed them with several coats of shellac, and then gave them a light sanding to smooth out the finish.
 While completing the drawers for the hand tool cabinet is a significant milestone in its build, I will not call it done. As my hand tool collection grows and evolves, new additions will be made to the cabinet. I will of course document them here and on video as well.
When I posted the pictures of the drawers out on social media, I got quite a few comments about the Asteroids sign on top of the tool cabinet. The sign is an old marquee off of an Asteroids game cabinet that I bought via E-Bay. When I was a bit younger, and not yet married, along with some coworkers, I set out to start build an arcade cabinet. I built a control panel, but never got beyond that. I had the marquee lying around, so I built a small case for it, and put a light behind it. Skip ahead a few years, after moving out of that house, getting married, going back to school for my masters, and several job changes it had been put in a corner of the garage and gotten forgotten about. When I hung the hand tool cabinet, I did a fairly extensive clean out of the garage. A lot of junk gotten thrown away, when I came across that sign. I found that the light still worked, so I put it on top of the cabinet, and plugged it in with the shop lighting. It now displays proudly whenever I am out working in the shop. While the sign has nothing to do with hand tools or woodworking, I often think back at what I had when I made that sign. I was still living on my own, and had a very modest amount of tools, mainly for home renovation. I didn’t have anywhere the woodworking tool capacity that I have today, but yet I was able to build a simple piece that has held up well over the years.
What a journey its been, and will continue to be!

 Okay I did have some fun, perhaps too much fun with this one, but both our cat and dog make a guest appearance in this video. 🙂 I will state for the record, despite the light cast on the Pudge, our cat, she is a very good cat.
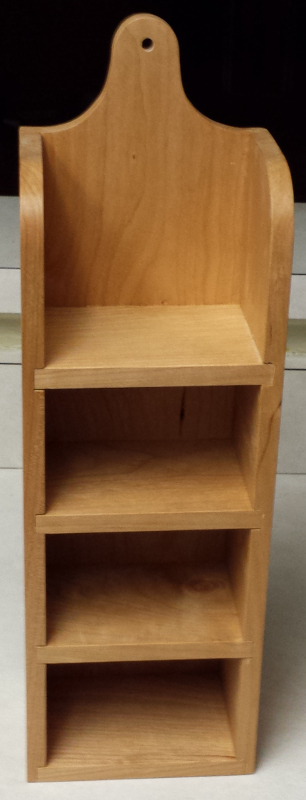
 It is Get Woodworking Week, a week that every woodworker should find time to get out to the workshop! Tom Iovino over at tomsworkbench.com has organized this once again to help motivate us all to get out to the shop! Realizing that many of us have garage shops that can only be heated for short period of times, it is worthwhile to find projects that can be completed in a short period of time. When looking for project to produce as a video for this week, I turned to one of my very first projects I ever made. In 7th grade wood shop class we each made a knick knack shelf. The shelf I made has been with me all these years since then and has a prominent spot on our mantel. This project has very simple joinery that can easily be taken on by any woodworker of any skill level. This project also fits the bill that it can be completed in a couple of days.