 This is can be topic of huge debate, and has been discussed many times over. Reading through the various woodworking forums and chatrooms, I see reoccurring themes along the lines of “You get what you pay for” and “I can’t afford to buy cheap tools!” While I don’t disagree with these statements, I have noticed that a lot of those who say that tend to own very high end tools that sell for top dollar. The reality is that most people starting out with woodworking as a hobby would run away screaming if they saw how much some of those machines sell for. On the other end of the spectrum I have seen more than once, myself included in this, where a low end machine is purchase and a high degree of frustration due to the machine not performing as expected.
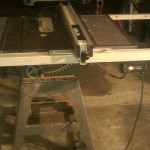
However, I do believe that was proper planning and research, the right table saw can be found for your needs. With my conversations with others, I often hear “I am just starting out so I don’t want to start out with something too expensive” or “I am just a beginner, I am going to get a cheap machine.” I shudder a little bit every time I hear something like that. Instead of looking at your current skill, look at the skill level you want to achieve. Next think about what you will be primarily using the table saw for. For example, is it primarily going to be used for repairs around the house, building furniture, or even going into more fine woodworking. Next look at your power availability. Many higher end table saws require 220 volt outlets. This may or may not be a big cost depending on the location of the circuit panel, and the number of open slots. If it is not feasible, there are still many good table saws that run off of 110. Finally, (and this was intentionally left for last) your budget. It is very tempting to to put budget first, but the issue is that you may end up buying too much or not enough of a machine to meet your needs. If you determine that you need a higher end machine but have a limited budget, perhaps waiting a little longer to save more for the machine you need, or looking at used saws. I personally use an old table saw I bought used via Craigslist, and while I made some upgrades to it, has proven to be a very good saw for my needs, and didn’t bust any budgets.
So, the question remains what table saw is best to buy. When walking through your big box stores you see a lot of the bench top/job site table saws. If you are doing anything other than home construction and/or repair, I would stay away from them. Based on my experience from owning one myself, at first, you will have a decent saw. Can you learn from this type of saw? Yes absolutely. In fact I have seen where some old timers use these saws and do beautiful work on them. However, it does take a considerable amount of patience with these saws to achieve this. The issue is the materials used to make these saws just do not hold up well over time. The trunnions are thin aluminum, the table is cast aluminum, and the body is made from plastic. With my old saw I was constantly fighting it to keep everything square. What finally did it in for me is the table itself went out of flat, which made getting the blade square to the table near impossible. For furniture and fine woodworking, this makes it very hard to use this saw well. If you are planning on making this a serious hobby, possibly planning doing some commission work then I would start looking at the high end of table saws. Look at the high end hybrid or even cabinet saws You will want a machine that keeps up with your demand. For folks, such as myself, who are primarily weekend warrior woodworkers, look at the contractor and hybrid saws. Any of these saws, which come with either cast iron or granite tops, well allow you to achieve a much finer degree of woodworking. Obviously the higher you go on machine quality the better cut you will get.
Lastly, whatever table saw you decide to buy, along with it, buy a good blade. The blades that come with table saws are awful. They aren’t very sharp and will dull pretty quickly, which will leave you with a poor quality cut. A crappy blade will even make the best table saw perform crappy.
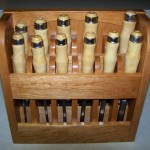
 About this time last year my Dad gave me vintage Delta lathe, that I have figured out to be the Delta Double Duty 955. It came with a lot of worn out turning tool, all of which were too small to be practical. I still have them, but they do not get used much. So that I could start the process of learning how to turn, and learning how to sharpen turning tools properly, I went against my rule of not buying cheap tools and bought a very cheap set from Harbor Freight. I still take much flak for this today. 🙂 The sad thing is, they work better than even I thought they would, and I am still using them today!
