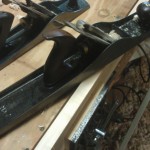
 So, I have been making much more of shift to hand tool usage then I ever thought I would. This was quite evident this past weekend when I pulled out my 100+year old Stanley Bailey #7 jointer plane. My goal is to glue up 3 four foot long rough sawn boards so that I can a board wide enough for my current project. Typically when setting up a glue joint, the best thing to do is send the piece over the jointer. Unfortunately, the beds on my jointer (small bench top machine) are way too short to joint a 4 foot long board. With a lot of messing around with stands I can make it work. I bought the #7 jointer plane as an alternative to using the jointer. The process I used below are mostly what I figured out using trial and error, and may or may not be considered best practices. However, that is the great thing about woodworking, there are so many different ways to accomplish a given task!
Challenge #1 – Getting a straight edge
This is what the jointer plane is made for. It does a great job at smoothing the edge, and making it straight. Just like on the jointer, a few passes is typically enough to get the rough sawn edge smooth. The length of the #7 (around 20inches) is what gets the edge straight. As I progressed through the first board I worked on, there were several lessons I learned. First, pushing a large jointer plane is a great work out! This is a heavy plane, being pushed over a fairly good distance. Next, the first indicator that the edge is becoming straight is visual. The rough material will start to disappear leaving a smooth surface. The second indicator is to listen. When pushing the hand plane it is possible to hear when the blade is cutting or not. When it is not cutting, that is an indication that there is a valley. Once you can hear a non-stop cut, the board should be pretty straight. Finally, check it with a straight edge. The piece should be straight.
Challenge #2 – Getting the edge square to a face
 My delight of getting a straight edge was quickly turned into frustration when I took a square to checked the edge in relation to one of the faces, and it was no where near square. Still being new to hand planes, I wasn’t quite sure what to do to fix this. My first instinct was to simply tip the plane to start trying to bring down the high side. I found this made thing worse. As I started thinking through the issue, and with some help from the TWW chatroom (Thank you Roger!) I realized that the various adjustments on the plane are for more then just making sure the blade is properly placed in the plane. Frequent adjustments of both the depth wheel and lateral adjustment handle is what gets a good square edge. When starting out with a rough piece, an aggressive cut is desired. However, pulling back the blade a bit helps quite a bit with making adjustments to the cut angle. After several LIGHT passes, I check the edge with my square. If I see a gap, its not square. To deal with this, I lightly push the lateral adjustment lever slightly towards the side of the gap. Making small changes is key here.. Keep repeating this process until the edge shows to be square. I found that it is also good to check for square along multiple points along the board. Make light cuts and check for square often. Finally I found it is worthwhile to clamp the faces of the two boards that are going to be glued together, and make a couple light passes on the edges to be glued together. This should make sure that a good solid glue-up for the boards.
Conclusion
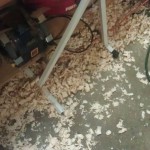
 So after spending many hours playing with my plane, and creating a mountain of shavings, I finally achieved a couple straight and square edges that are ready for glue-up
