 It is still way too cold to be doing any real wood working out in the garage. This morning with wind chills, it was -16 degrees outside! However, since it will probably be at least a month and half before I can start regularly working in the garage again, I thought I would post some of the projects I tackled in 2010.
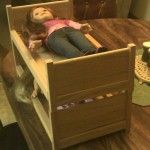
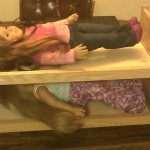
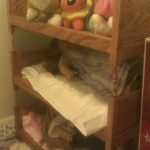
The first one was probably the most time consuming project for 2010, which was actually started around Christmas time in 2009. However the bulk of the work was done during from winter, into summer of 2010. This project in fact is what reinvigorated my wood working hobby! The need for this project came about because my daughter collects American Girl Dolls. If you know anything about this line of dolls, collecting the dolls and their accessories can be as expensive as this woodworking addiction. My wife asked me if I could attempt to make a simple doll bunk bed for three dolls, as she felt I could make it for a lot less than what they sold theirs for.
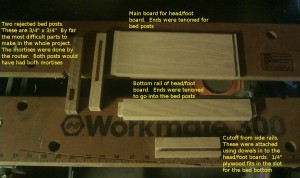 I didn’t have any real plans, just some thoughts in my head on how I wanted it to look, and measurements of the dolls so that they would fit in the beds. I started out using some scrap red oak I had laying around from a previous project. I made the decision to make the head board and foot boards the same, to make things easier, as ultimately 6 were made. The boards were all made with mortise and tenon joints. Note the illustration showing how the joints were made and went together. Since I also made this a learning experience as well, I tried different methods in making the mortises. For the bottom rail in four of the boards, I used the drill press to clear out most of the mortise, then used a chisel to clean it up. I made the tenons as close as a match as possible, but then spent some time cleaning up both the mortise and the tenons to get a good fit. I used the router to make the long mortises for the solid board. I did about half of these on the router table, plunging it into the router bit, then lifting it out. This technique works well with bigger pieces, but these parts were two small to control safely. Unfortunately this resulted in a couple of pieces needing to be remade. I made a jig that used guide bushings on the plunge router to make the mortises. This worked very well for cutting the long mortises. I found that by using a smaller guide busing I was able to make the short but wider mortises just as easily. I then sanded each part of each board down to 220 grit before glue up. After glue up, I took another pass with 220 to clean up any points where the glue may have squeezed out.
I really wanted to mortise and tenon the main bedrails, but realized that where the mortises would need to be would interfere with the joinery of the boards to the point that I was afraid it would weaken them. To solve this issue I used dowels, and a shop made dowling jig. This worked fairly well, and I was able to get a decent fit. Finally I ran a dado down each rail so that I could put a 1/4″ sheet of plywood in for the bed support.
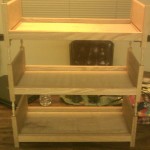
After some dry fitting, I realized that I made the boards too short. There wasn’t enough space between them to make the dolls look comfortable in the beds. I spent some time thinking on this. I found the solution one day during one of my many trips to my local WoodCraft I found some maple spindles that were a perfect solution. Before the final glue of the beds, I spent quite a bit of time with dry assembled beds to drill the holes and making sure they mated to the supporting bed. Once this was completed, I did the final glue up of the three individual beds. I made sure the spindles were a tight fit, as I elected not to glue them to the beds. This way my daughter can reconfigure the beds if she decided she didn’t want them bunked.
The finish I applied was a couple coats of red mahogany stain and a couple coats of semi-gloss polyurethane. After letting the finish cure for a couple weeks out in the garage, my daughter happily took ownership of the beds.

