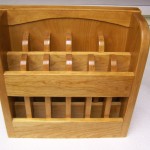
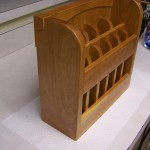
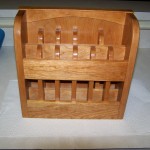
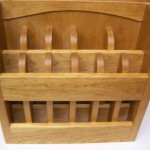
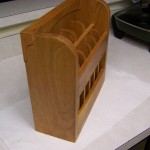
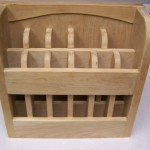
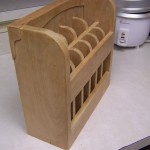
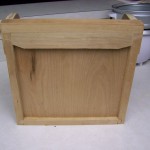
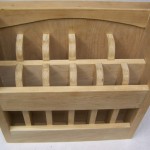
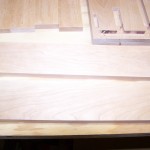
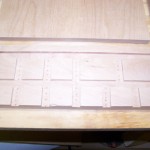
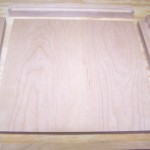
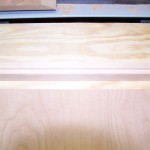
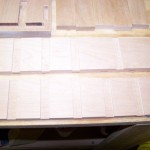
The coats of shellac have been applied, and I very lightly sanded the last coat with 400 grit sand paper. The result is a finish that has just the right amount shine to it. In fact if it is in the right light, you can see a little bit of a reflection in the finish! The last picture was taken with the flash, and you can see some of that reflection happening! I did cut up a foam rubber mouse pad, and covered the bottoms of each slot with that so that will help protect the sharp edge of the chisel. The rack itself is basically complete now. The next step is to sharpen and hone all the chisels going into it, and to of course, find a place on the wall to hang it! Will take and post pics once that has been completed as well.
Author: Mike
Chisel Rack with Boiled Linseed Oil
Published on by Mike (Leave a comment)
Chisel Rack Project
Published on by Mike (Leave a comment)
Chisel Collection Update & Current Project
Published on by Mike (Leave a comment)
I know it has been awhile since I last updated, but I have been busy make sawdust!! I am happy to say that the chisel collection is now complete! The last picture you saw, there were only 3 chisels. I am happy to say I now have the complete set at 11 chisels! There were a couple of factors into why I opted to get the complete set. The biggest factor is cost. The local woodcraft had a 25% off sale for all chisels, which started AFTER I bought the first 3 pictured in the earlier post. Except for those 3, I was able to take advantage of that sale for the remaining chisels. Thankfully the sale ran for awhile! The other reason was after some coaxing from a few people on TheWoodWhisperer.com chat room (you know who you are) they convinced me it is better to have them all and use them occasionally, and not have it and need it. Surprising, I have found I have used all the chisels, fairly frequently while working on the current project, which has had a lot of hand work on it. Fyi, the chisel have been great, I would give them a 5 star rating.
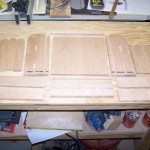
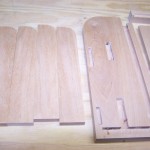
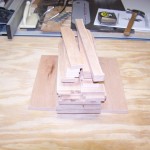
The project I am working on is a storage rack for the chisels. This started out with a drawing I made in sketch-up. From the sketch-up drawins, I estimated the amount of wood I would need. I ended up buying 7 board feet of cherry for the rack. This was 2 more than I figured I would need, however I ended up using ever bit of it! Most of the longer dados were done on the router table. A lot of them were stopped short, and the squared up with my chisels. The short dados on the bottom piece were done largely by hand with the only power tool being the drill press to hog out most of the material. All the mortises were done by hand, again using the drill press to hog out much of the material. The back panel is a glue up of two smaller boards. I had the foresight to glue them together at 3/4″ thick, and let them acclimate awhile. Sure enough, I got warpage. I used, for the first time, my jack plane to get the wobble out, then planed it down to the 1/2″ thickness. The pictures below are all the parts needed to assemble the rack. Each piece has been sanded to 220. The next step is assembly, which as of this posting is not done yet. I will make a future post of the assembled rack.
Table Saw Guide Part 1
Published on by Mike (Leave a comment)
Depending on where you are from and the type of woodworking you want to do the table saw is arguably the most important power tool you can have in your garage or shop. Some alternatives include a good band saw or a track saw, and like the table saw each has its own strengths and weaknesses. This post will be focusing on the different types of table saws available.
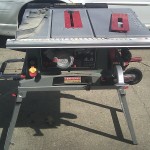 Bench Top / Job Site saws: This type of saw is the most common saw you will see as you walk through Lowe’s, Home Depot, and Sears. They are all shapes, sizes, and have a wide range in pricing from around $100 up to $600. The main characteristics of these saws include plastic bodies, aluminum top (some of the higher end saws have an anodized top to prevent marking up the wood), and a direct drive universal motor. Because of their light weight, a lot of these saws come with stands that can be collapsed so that they can be stored off in a corner. The drawback to this saw is that they are light weight which results in a lot of vibration. The fences are usually not very good, and often the tables are small. Precision can be achieved with these saws, but I would recommend frequent checking and tweaking of the saw to make sure everything is aligned and square. These saws work well for doing rough work.
Contractor saws: 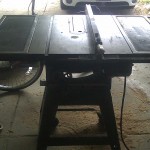 You can see a minimal number of these in the box stores, but because of the higher price point, they typically don’t stock a lot of these, if any. These can priced from $400 (if you find a good sale) to over $1000. These saws you will see the cast iron top (some brands offer a granite top as well), with a belt driven induction motor, usually external to the saw body. The motors usually run between 1.5hp to 2hp, and can either be run on 110 or 220 volts, depending on how the owner wants it wired. The body is typically made from stamped steel. Like a Bench Top saw these still sit on a stand that saw is bolted on to, but these are heavier stands and will not fold down. These are heavy enough that vibration is greatly reduced but still can be easily moved around if the stand is on wheels. The fences that are typically included are step better, but still not great. The good news is that the fence on these saws can be upgraded, and many manufacturers offer options for better fences. With a good fence precision can much more easily be attained, and because most of the parts are bigger and made from metals the saw will hold its alignment much better. Occasional checking is still recommended.
Hybrid saws: Except for maybe Sears, you won’t see these in box stores. You will need to look for these at woodworking specialty stores such as Rockler and Woodcraft. They can be priced anywhere from $700 to nearly $2000. The motors are configured similar to the contractor saws, except for that they are usually inside the saw. Amother difference is the body of the saw is one piece and goes all they way to the floor. The greater weight reduce vibration even further. I believe some hybrid saws, if not all, the trunnions that hold the motor and blade assembly attach to the body of the saw rather than to the top. This saw provides a lot of the same features as a cabinet saw, but with a smaller motor and a lower price point for the budget conscious.
Cabinet saws: This is the type of saw you see Norm use on the New Yankee Workshop. These are priced from $2000 up to $5000. The body is bigger than the Hybrid saw, and the trunnions are attached to it. The motor is also bigger, typically starting out at 3HP. Also, these must be ran with 220V. These are typically very heavy tools, and very rarely fall out of alignment. These are typically the choice of the serious hobbyist and professional woodworker.
My next post of this topic will include my experiences on table saw purchases, and my recommendations for getting started.

