Dust Collection – Part 1

Published on by Mike  (Leave a comment)

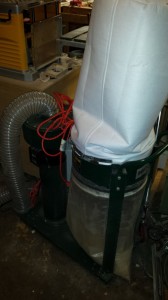
rikon_dcThis is one article I have been putting off for a while.  The topic of dust collection can be as touchy as discussing politics or religion.  However, one of the major projects I took on this past summer was improving the dust collection in my shop.

First, before I go any further, my disclaimer is that my solution is by no means the best solution out there.  There were a couple constraints I had to work within as well, and I was more or less focused on solving a couple specific issues with my setup.  Finally, I believe any dust collection setup is like any other aspect of the shop, in that it will be something that will always continue to be improved and updated.
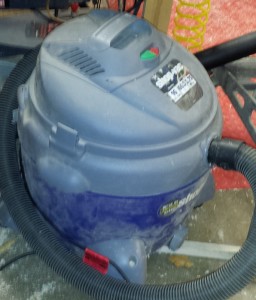
shop_vacBefore I started, I wasn’t completely without dust collection.  I had a small 1 hp dust collector, that I used it directly on each machine.  This meant either bring the machine (namely the planer) to the dust collector, or bringing the dust collector to the machine itself.  This worked, but it got to be a hassle.  In fact, it made the process of milling lumber difficult.  On top of that my table saw had no dust collection at all.  I got tired of the mountain of sawdust that would always develop under my table saw.  I also have a shopvac that I use for sanding and general cleanup.

What I would have really liked to have done is put in a cyclone system that I could have ducted to each of my machines.  However, I don’t have the ability to run a dedicated 220 line to power it.  Also I had promised my wife that I would not make any large tool purchases for the year, as past years I had made quite a few of them.
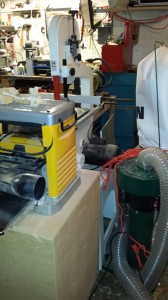
planer_bs_dcTo start with the improvements, I took a look at the layout of my tools.  The small dust collector is kept behind my band saw as that is where it gets most of use.   Also, the jointer is just across the from the band saw, so it made since from both a dust collection stand point, and milling stand point to move the planer  However my planer is on the cabinet that stores all my router bits and accessories which I wanted it next to my router table.  However, when I put the tool cabinet in place, the planer was in the way.  So this gave me the opportunity I needed to move it.  My new OSS on its stand was short enough to go under the tool cabinet, so I just simply swapped them and have to take a few extra steps to get to my router bits.  I now dedicate the small dust collector to the band saw and the planer, simply by moving the hose between the two machines.  This also has significantly improved my workflow for milling boards.

This, however, left my jointer and table saw without dust collection, and with the layout of the shop, it was hassle moving the small dust collector from machine to machine, which made it way too easy to not use dust collection at all.  My next post I will discuss what modifications I made to those machines to improve their dust collection.

Puzzle Cutting Boards – Final Project of 2013

Published on by Mike  (6 Comments)

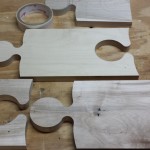
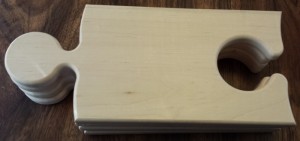
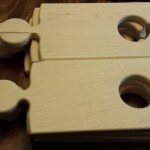
cutting_board_set_connectedThis was my busiest Christmas holiday in the shop yet.  After completing the easel for my Nephew, I started working on request from my wife.  She found a picture of some cutting boards that she thought would make a good gift for some family and friends.  They are made in the shape of a puzzle piece, and can be linked together for cutting french bread.  Or as single boards they can be used for cheese and cracker boards.  The puzzle socket also allows for a wine glass to be held.

cutting_board_two_sets_stackedI ended up making 2 sets of 4, with a 3rd set on order from my wife.  Each set actually was made fairly quickly.  What took the most time was making the template.  First thing, was I needed to be able to run the rough cut piece through my 6″ jointer, and still have a full sized board with no glue-ups.  So the template was 5 7/8″ wide.   The length is roughly 13.5″.  Before I even started with a full size blank, I started working on the circular rounded front.  While I probably should have done this on paper, I elected to do it on some scrap wood that I was able to cut down to the width I needed.  Using a compass, coins, and free hand, I came up with a pencil design that looked good.  the one thing I didn’t pencil out was the shoulders on either side of circle.  In fact, I free handed out two options on the band saw, a concave and a convex version.  After cleaning up the cuts on my oscillating spindle sander, I traced out both versions on another piece of scrap.  I ended up liking the convex version far better than the concave, so I went with that.  Using the two different sided piece, I made another template with the finished profile for the front.   I did this by tracing the half the piece, flipping it, the tracing the half.  I then used the drill press to drill out where the band saw wouldn’t go, then roughing out the shape on the band saw.  I then used a flush trim bit on the router table, flipping the template once to get a symmetrical profile.

cutting_board_templatesOnce the front template was done, I started on the back template. Again, I used another scrap piece at the same width.  I then used the front template to trace out the profile on the back template.  I then roughed out the shape on the band saw.  I then used my OSS to clean up the shape back to the lines.  I then carefully started taking more material off the template until a good loose fit between the two templates could be made.  I didn’t sweat any imperfections as they would be hidden by the round-overs I would put on the actual cutting boards.  Once I got the back template done, I was ready to make a full size template.  Using the band saw, and flush trim method I used earlier I was able to complete the template.  I then marked on that template with the dimensions needed for the work pieces so that I would have them for future use.

cutting_board_set_stackedFinally, I was able to start on the cutting boards themselves.  I used maple for these, but really most closed-grain domestic woods would work very well for this application.  Again, the process was tracing the template to the work piece, roughing out the shape using both the drill press and band saw.  Then using woodworkers tape, attach the template to the work piece.  From their on to the router table with the flush trim bit, and then round over on both sides.  With some finish sanding, the boards were ready for finish.  The finish of choice is butcher block oil.

The puzzle cutting boards were a fun project to build, I have a feeling that I will be using the template often.

Marking Gauges – Shop Made Tools

Published on by Mike  (Leave a comment)

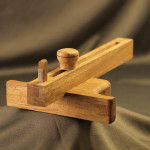
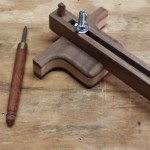
Emm's Marking Gauge One of the joys I have found with my journey as a woodworker is making my own tools.  A few years ago I turned a mallet that I use all the time.  This is the same mallet that appears in my blog’s logo.  I have also made making knives as well.  One thing I had wanted to try to make is a marking gauge.  After finishing the hand tool cabinet, I took some scraps I had lying around the shop and started planning one out.  In the research I did, I see a lot of people making the “bat” design marking gauge.  While it was an interesting design, I decided it wasn’t for me.  What I came up with is really what I consider a hybrid of a traditional marking gauge and the newer bat design.

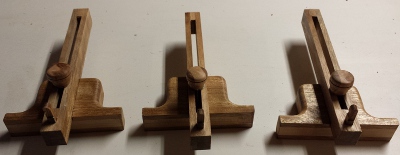
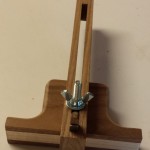
marking gauges 2From a tooling point of view, while most of sizing and shaping was done with power tools, the majority of the work was done with hand tools.  In fact the channel for the main bar was made completely with hand tools.  This actually allowed me to get the channel perfectly sized to the sliding bar.  The main face that register to the work piece was then made 90 degrees to the bar by using a smoothing plane.  This also got that face nice and smooth to help it glide along the work piece.  I used a card scraper to get all the remaining surfaces nice and smooth.

Shop Made ToolsThe blade was actually made from a jigsaw blade that I shaped using my bench grinder and dremel tool.  I had noticed that the modern marking gauges had a rounded blade vs.  a straight angled blade on the traditional marking gauge.  I decided to give that design a try.  I found to very positive advantages to that.  First, the rounded blade was easy to make, and fairly easy to sharpen.  Next, this allows the marking gauge to be used in either hand without changing the blade around, and allows the user more freedom on how the marking gauge is held.

first marking guageOn the first marking gauge I made, I just used a simple wing nut to lock the bar in place. I ended up making several more that I used some of the cutoff scrap from the bodies, and turned them into knobs.  I was a little hesitant at first as I wasn’t sure if a wood knob would be able to lock down tight enough.  But with the first couple experiments I did, I found they did the job very well.  Plus they look a lot better then a wing nut!

This was definitely a fun project to take on.  Plus, it does give me an additional feeling of pride that I put into my work when I use a hand tool that I made with my own hands.

Emm's Marking GaugeA quick note, the first picture was beautifully taken by Karen Mack.  Thank you Karen for allowing me to use this picture!

Heating the Shop – Be Safe!

Published on by Mike  (2 Comments)

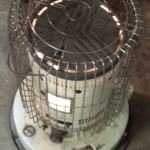
kerosene heaterMy shop is in the garage of my home, and effectively has no climate control in it.  As many other woodworkers do, I use a kerosene heater to warm the garage during the winter months.  Using some common sense, this is a safe and effective way to heat a space.  First, as with anything thing that burns there is a risk of carbon monoxide.  It wouldn’t be a bad idea to have a detector in your shop space to alert you if the levels are getting too high.  I had a friend who had one of theses heaters started having flames go outside the heater.  What saved this from being a tragedy is he kept at least the minimum 3′ clearance around the heater.  That is not optional.  Fortunately for him, nothing was damaged.    However, this brings me to my next point, this was completely preventable.  What he found after taking apart the heater was what ignited wasn’t creosote or any build up on the walls of the heater, but rather that collection of sawdust and shavings that had worked its way inside of the heater.  At LEAST once a year, take the heater apart and clean it out!  The spring after his heater ignited, I cleaned mine out, after many years of use.  I will say I am fortunate as well that I didn’t have the same thing happen!  I found I had next no build up of creosote or any other crud on the walls of the heater, but I had a good thick layer of sawdust just under the heating element.  Keeping the heater clean, and keeping debris away from it is paramount!

Something to note for your tools, a byproduct of burning kerosene, or any other fossil fuels, is water, and will put water in the air.  For most dry winter days, this won’t be an issue.  If it happens to be a little more humid outside due to snow melt off, it can really raise the humidity in the shop.  You will also get a situation where the air gets warmer then the tools, which on smooth cast iron will create condensation.  I was not happy when I found a layer of orange on my brand new jointer bed!  (Fortunately it was a very light layer, and cleaned up well)  The lesson from this is, keep up with tool maintenance, make sure your cast iron surfaces are protected.  When the heater is lit, don’t leave it unattended!  When you extinguish the flame, make sure it cools completely before leaving it.  Also, make sure it is completely turned off.  As the heaters age the turn off tends to catch so it is always wise to make sure that the dial is all the way in the off position.

Most gas stations that sell kerosene only charge sales tax on it, so it is not street legal.  Being that kerosene is chemically similar to diesel, the stations will only allow you to dispense into a blue container.  Note, there are two types of kerosene available.  Once is clear, the other has a pink dye in it.  Use the clear stuff as it burns more efficiently.  In fact most heaters state that clear kerosene is required.

Easel – Woodworkers Fighting Cancer 2013 Build

Published on by Mike  (Leave a comment)

WoodworkersFightingCancerI have been a little lax on blog posts lately, but I assure you it has been for good reason.  The last couple weeks I have spent my spare time working on an Easel that is this year’s Woodworker’s Fighting Cancer charity build, put on by Marc Spagnoulo of The Wood Whisperer.  Cancer has had a significant impact on my family, so being able to build a project that will benefit those who have cancer, combined with the fact that I sent a nice Christmas gift my nephew is definitely a winner.  Just by building this project and submitting a photo of it, Marc, Steve Ramsey of Woodworking for Mere Mortals, and several other corporations will donate $5 a piece to CancerCare, and will for anyone else who builds an Easel.

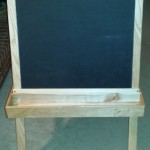
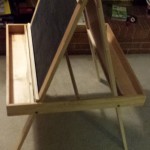
Easel BlackboardI had to work somewhat quick to get this done, hence the reason for the lack of a blog post for the past couple weeks.  My nephew lives 8 hours away from there, and my dad is spending the winter with my sister and her family, which he left just before Thanksgiving.  So, to get it down to them in time, I had to get the easel completely finished before he left so I could get it down to them.

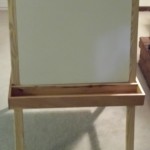
Easel Side 1For the most part, I followed the plans fairly close that were provided from Wood magazine for the build.  As Marc showed in his video, I used pre-made panels for the chalkboard and whiteboard rather than paint melamine with the respective paints to get that surface.  I also made it so that tools were not required to put the easel together and take it apart.  I put pegs in the frames with cutouts on the tray that fit into the pegs.   This worked out well with the easel being very solid once assembled.  The wood used was ash, and the finish was shellac.

Easel WhiteboardThis was a fun project to make, and with the deadline for this build being Dec 9th, there is still plenty of time for you to make one as well!