The value of a project

Published on by Mike  (4 Comments)

pricemeA week or so ago I had an acquaintance come up to me and ask me how I would go about building a knife block.  He has a set of steak knives with no block and was having trouble finding one in stores.  I do occasionally have people reach out to me and ask me advice on building something, and I am always willing to share. I gave him a couple ideas on how one could be made.  He then offers me $20 to make him one.  I politely declined.

I haven’t yet made anything with the intent to be sold.  The closest I have come to that is building gifts for others.  That said, I have not figured out what the best formula is for pricing my work.

To make a point, I have no issues against Ikea or Walmart.  They both fill a market need, and, admittedly, have shopped at both stores.  However, what I, and other woodworkers for that matter, find frustrating is when people confuse mass produce products of varying quality to a custom piece.  My goal in the wood shop isn’t to build something that will compete Ikea or Walmart.  The products in those stores are mass produced in a way to produce them quickly and cheaply.  For the casual on looker its hard to get past that idea, and are often surprised at how much a custom piece can cost.  They don’t see the preparation of the stock, the machine setup, the test cuts, applying the finish, or even the time it takes to come with even some basic plans.  Therefore, even a simple knife block could have 5-6 hours invested in it.  So, for that amount of time, for a custom made piece, would $100 be fair?  $80?  $50?  While it would be easy to say “it’s just a knife block”  it is easy to forget it is custom made vs. store bought.

Being realistic, I doubt I would ever take on a commission that simple, simply because no one would be willing to pay what it would take to make one, vs. buying from the store.  Unless of course its my wife asking for it!  🙂

Along the same lines, a more realistic commission would be a piece of furniture, say a night stand.  This could take 20 or more hours to make, and for a skilled woodworker, it would not be unreasonable to ask $1000.  Most likely this is a custom design that has gone through several revisions till it meets his customer’s satisfaction.  Then their is material cost.  Lets face it, good hardwood is not inexpensive.  Then after the piece is made, providing the customer finish samples so that they can get the right look.  It is easy to see why a simple furniture piece can get up to $1000.  Now understand what his frustration would be if the customer asked the woodworker to do this for $100.  I know I wouldn’t be happy.

Since I haven’t done any commission work myself, I don’t feel in a place to offer much in the way of pricing a commission.  However, I can understand to a degree people’s misconception of how much a commissioned piece should cost.  First off, they are flooded with DIY TV shows that demonstration projects being put together in under 30 minutes, so it seems much more simple to build a piece then it really is.  Also if a person’s budget is tight they maybe look for a cheaper alternative then what they see in stores, and not understanding what is involved in making a piece, think that having a piece made is a viable option.  The reality is what a piece costs in a store would barely cover the cost of material for a custom made piece.

Coming up with a reasonable price for a commissioned piece is always going to be a challenge.  The best advice I can give anyone who is ready to branch out to this, is have a fair pricing formula, and be able to clearly show the customer what is going into the piece.  Finally, don’t ever undercut yourself.  Your time is worth more than you think, make sure you get something for it.

Buying used tools

Published on by Mike  (Leave a comment)

WP_20130716_003[1]  I have bought and sold tools via Craigslist.com with a great deal of success.  I recently updated the dust collection in my shop.  Part of my plan was to either buy a used dust collector online or buy the Harbor Freight dust collector that is labeled as 2 HP.  (It really is closer to 1.5HP)  I ended up finding a DC on Craigslist that looked like it would meet my needs.  It was advertised as having a 1 micron bag, a 6″ hose, and a 1 HP motor.  It had a picture of it, but the often scale is difficult to judge from a photo, but if it had a 6″ hose, it looked like a large machine.  The poster did not put a model number on it, but I did some research and discovered that the manufactured still made a similar looking unit.  However, it showed a 30 micron bag and 4″ hose.  Now, dust collectors manufactures often make multiple units of different sizes and look similar, so it was possible that he had a larger version then what I was looking at. The price was decent, with room to negotiate, so I made arrangements to see the machine.  With cash in the pocket I went to look at the machine.  As I had feared, it was not as advertised.  I immediately saw that it was indeed the smaller machine I had looked at.  It definitely had the 4″ hose, and the filter bag was in no way an upgraded 1 micron bag, but rather the standard 30 micron bag that cam with the collector.  I ended up walking away from it.  Since I was ready to work on my dust collection, I decided I had looked long enough for dust collectors, and got the Harbor Freight machine.

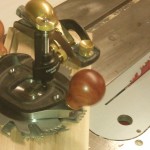
WP_20130716_005[1]I was asked by another woodworker to write this post (thank you Karen!) in hopes that it would help someone else know when to make a good purchase, or walk away from it.  We had realized in our conversation that someone just getting started out may end up buying something different then what they think they are getting.  Speaking from my own experience, that is never fun.

For my most recent experience, doing my homework paid off.   Anytime I prepare to buy a used tool, I research it.  There are many things I look for that make an impact on my decision.  First thing, I need to know what tools work well, vs what I should avoid.  When I was researching table saws, I saw several of the old cable drive saws at a good price.  I almost jumped on one, but then I read that the cables have a tendancy to break, and it was near impossible to find a replacement.  So even though the price was good, the chance of buying a boat anchor was great.  The next thing I look for, is the age and shape of the tool.  This will often factor in what it will be what I am willing to pay for it.  Next, the brand of the tool. Finally, I look at, if possible what the price was new, what it would currently cost to buy new, and what similar tools are going for used.

WP_20130716_002[1]The trickiest part of this process is determining what to pay for a used tool.  For power tools, the rule of thumb has been 50% of what the machine (or equivalent) is going for new.  I don’t quite follow that.  If the machine was made in the last 10-15(and thats a stretch) I think 50% is typically fair.  However, in most cases, buy a used machine is like buying a used car.  As it gets older its value does drop.  Other exceptions to this rule is premium brands.  I have seen some of the go for as much as 85% of new.  Both those numbers also assume that the machine is in good and useable shape.  Again, the exception to that is dull blades.  If you buy a tool used, just assume you are going to put a new blade on it.   The only time I would consider paying more then 50% for an average tool from craigslist is if it is still in the box unopened.  I actually tend to stay away from these, as the seller tends over inflate the price.  I personally, will only pay 60%-70% of new.  The reason being is that there is still a higher risk buying these tools versus buying it off the store shelf.  Unless the seller gives you a recent sales receipt for the tool, there is no warranty on it.  Many sellers post for 85%-90% of new for a “new in box” tool.  Personally, I will go ahead and pay the extra and get the warranty.

I am not going to go in a discussion of hand tools in this post.  The rules for pricing on these is all over the place.  My recommendation, is do your homework on this.

Finally, very rarely is the price advertised fixed.  Craigslist was founded on the idea of the barter system.  So barter!  Just about every seller knows how much they want to get out of something, and then (hopefully) reasonably increase the price for negotiating room.  I have successfully negotiated price for craigslist both in person and over email.  This is an important tip for sellers as well.  You want to REASONABLY increase the price for negotiating room, so that you are not gouging the buyer.  First, if you do raise it too high, no one is going to even look at it, much less buy it.  And yes, it is great when you get a little more out of a sale then what you had planned on it, but you also want to be able to go to bed at night knowing it was still a fair price.  From a buying standpoint, I have absolutely no problem giving a low-ball offer to a tool that is way overpriced, usually over email.  Most of the time, I don’t get a response, and that is not unexpected.  However, it does not hurt to ask, and may end up working out in the end.

**Thank you to Cosmin for the pictures of the beautiful Japanese woodworking tools!

Evolution of my shop

Published on by Mike  (2 Comments)

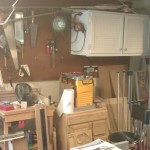
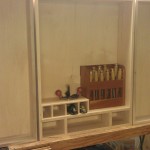
2013-06-08 16.06.27Yes, I know, my posts drop off when I am working out in the shop.  However, the time between my last post and this one has not gone to waste!  There have been quite a few changes in the shop!  Every shop is a constantly changing environment.  When we first moved into this house, most of my tools were small and portable, and I would take them out to the driveway and work.  Most of the projects I undertook then were home improvement/repair related, and a few other smaller woodworking projects which were well perforated with brad nails.  (Sorry Norm)  The white cabinet on the wall I made for power hand tools, and really was the first storage towards my shop.  It was perfect for that use, and was on the wall for quite a few years.  Everything else I had was well stored on the peg board around it.  However, as my interest in woodworking grew, and my projects became more sophisticated, my tool needs changed, and therefore my storage needs changed.  Now if you told be 3 years ago that I would have a hand tool collection beyond a set of chisels, I would have laughed.  However, that soon changed, and my hand tools started growing.  Quickly.  🙂  So that is how and why the hand tool cabinet project began.  Other storage needs had also cropped up besides hand tools.  Last year I started buying clamps.  Real clamps.  Not the junk i had bought from a discount store a few years ago.  In fact I have started buying Bessey Revos and Bessey F-clamps.  The nice thing about the Revos, they do stand up on their own.  However, they do take up a lot of floor space, and honestly, I have knocked them over more then I care to admit.  So, wall storage was needed as well.

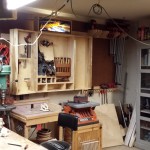
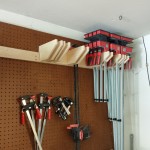
2013-06-24 23.08.322013-06-22 14.58.54So, now the hand tool cabinet is up on the wall, and my still growing collection of hand tools are stowed away in it.  Each tool, that didn’t end up on the plane till or in the chisel rack all had custom hangers made for them.  I eventually want to put a saw till in the right door, but with just the one dovetail saw and the one Japanese saw, I decided to leave that for a later project.   I still need to make the drawers for the cabinet, but those will come later as well.  I also made two clamp racks.  The first one is for the k-bodies.  If you notice, it is intentionally only half full.  I am not buying those clamps yet.  🙂  I also made a rack down lower for my smaller clamps, including the F-Style clamps.

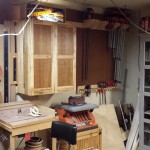
2013-06-24 23.08.05I dare not call the hand tool cabinet finished.  I don’t think I will ever call it finished, as it is meant to grow and change as  I do in my woodworking.  So don’t be surprised if 5 years from now if I still make the occasional update on it.  For now, on to the next project!

Oh, and the white cabinet did not go to waste.  My Dad took it, and is going to use it in his garage.

Dealing with complex projects

Published on by Mike  (Leave a comment)

102_2864 Except for maybe the quick and dirty projects that we all sometimes just throw together in an afternoon, most every project presents its own unique challenges.  My current project, the hand tool cabinet, has relatively simple joinery, largely rabbets and dadoes, with some hand cut dovetails for the drawers.  The complexity in this case isn’t the joinery, the complexity comes from the number of individual pieces in the cabinet.  Based on the sketch-up drawing, there 49 pieces!  If I took the entire cut list and started planing down boards and cutting individual pieces to size, I would have created a confusing mess. Plus I would have parts laying around for weeks, even months, before I would be ready for them.  There is a good chance the piece has moved due to humidity changes, or the piece may no longer be appropriate due to mid-stream design changes.

2013-05-05 17.54.26Instead, I try to componentize my projects.  With the hand tool cabinet, this was very easily done.  For example, I started out with the main box.  I planed down only the wood I needed for that component.  From there, I either work on one joint (if a complex joint) or one joint type.  For example, the main box is put together using rabbets.  So, I start out concentrating on the main rabbets, not worrying about the dados for the shelf or for the back.  If I start thinking too far down the road of the project, it makes concentrating on the task at hand that much more difficult.  Once I get all my rabbets cut, I move on to the next joint.

For more complex joinery, I concentrate on one joint, typically two pieces of wood, at a time.  This is especially important when fitting more complex joints like dovetails, or even hand cut mortise and tenons.  As I get each joint fit, I expand out to the next one, and proceed until all the joints are fitted and square.  Revisiting joints as necessary.

I had someone comment once that my chisel rack would be to far above their skill level to attempt.  Even though my chisel rack was my first real foray into a more “fine” woodworking using real joinery and no mechanical fasteners.  My response back was to them that was simply not true.  As I had accomplished this project, and I still consider myself a beginner!  While there are definitely techniques out there that are best left to the master craftsman, there are many complex projects that a beginner woodworker can undertake, just by taking it one piece at a time.


More thoughts on the power vs. hand tool debate

Published on by Mike  (2 Comments)

2013-04-19 22.45.53_enhancedThe heated debate from a few weeks ago seems to have settled down, but the discussion continues, I think for the good.  I have been reading through the various blog posts and tweets on this subject, and have found it thought provoking.

One of the blogs I read described how there is a tendency to use power tools to mass produce projects, thus reducing their uniqueness and the artistic value is lost.  (Noting that dollar value is lost as well)  It isn’t that big of a stretch to realize that we as woodworkers can and do get trapped in that same mindset when working our own projects, thus losing the “woodcraft” or artistic value within our projects.  To be honest, I don’t think I can disagree with this.  Why?  Sometimes we as woodworkers focus on getting to the next step of the project as quick as possible rather then putting our heart and soul into the project as a whole.  I think part of what makes a project woodcraft is allowing the flow of the project to come together organically rather than systematically.

The big question is, does this change my view point in my last post on this subject?  I did have to think about this for awhile, but I do still feel the same way.  I believe that this organic flow can be achieved using power tools, hand tools, or a combination of both.

Where I also did some thinking is what it takes to achieve woodcraft.  Don’t get me wrong, organic flow of the project is a significant part of it, but its not everything.   Its also taking the medium we are presented with, understanding its properties, imperfections and other qualities that makes it unique, then using the mind’s eye to work it into an art piece.

Admittedly, I do believe using hand tools does make it easier to bring us closer to the work piece leading to a better understanding the wood’s properties.  For me, when I started using hand tools, I did start looking at my projects in a different light, and in fact I feel that using hand tools has made me a better woodworker in general.

So how is all this possible using power tools.  The obvious answer is start out with power tools for doing the tough work, the finish up using hand tools.  That is one way, but I don’t think that is the only way.  I think as long as a woodworker stays out of the batching out mass produced parts mindset it is very feasible to complete an artistic project.  Ultimately, I think it goes back to allowing the project to flow organically as well as using the minds eye to determine what tool is used.