A few shop and blog updates

Published on by Mike  (Leave a comment)

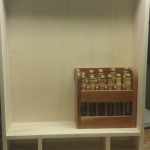
2012-09-03 20.37.16So, the good news is, it has finally started warming up outside.  Last weekend I bought wood for the tool cabinet, and milled and sized it for the two door boxes and completed the joinery for it.  I bought the plywood for the backs (1/2″ Baltic Birch Ply), and then started cutting the grooves for the plywood.  Unfortunately, as switched from the short to long pieces I hit the release on the fence, and didn’t discover it till the cuts were complete.  I didn’t release enough for it to be completely loose, but enough to move it as I held the board against the fence.  So each piece has the groove in a different spot.  Therefore, those boards will now be re-purposed to other parts of the cabinet, so the wood will not got waste.  However, as I don’t have enough full length boards to get 4 36″ long pieces out of it, I am going to have to make another trip to Muterspaw Lumber next weekend to get more wood.  I still haven’t decided what I am going to do for the drawer fronts, I just know I want them to stand out some how.  Hopefully next weekend I can make an actual update about real progress on the cabinet!

Another shop update is that you may not just see me working in the shop.  My step son has taken up pen turning, so you may see him working on the cam from time to time too! Perhaps someday I can get him to contribute on to the blog too…….  Okay, I wont push my luck on that one! 🙂
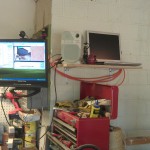
2012-09-10 18.34.04Finally, if you are following along my blog, I have talked about the dedicated shop computer I have set up.  The computer is old.  The wireless card built into it didn’t support “N” which limited its range.  Well, I finally gave in and bought a new USB wifi network card.  The good news is, it seems to have worked!  I ran the stream for 3 and half hours without interruption!  So when I tweet out that the cam is up, it really will be!!  🙂

As for the blog, no major site updates to speak of.  I did however make a Facebook page for the blog.  You can visit it at https://www.facebook.com/Sawdustnewbie.  For all you Facebook fans, this gives you another option to follow my blog.

Also, I think it is worth noting, that the blog did recently hit a milestone.  The site reached 5000 views!  Traffic to the blog has steadily been increasing.  Thank you all for taking the time to visit my blog, and hopefully soon the blog will reach 10,000 views!

New Table Saw Fence – Part 5 – New Wings

Published on by Mike  (Leave a comment)

Original Posted on November 3rd, 2010

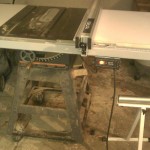
new_wingsAfter a couple months of usage, the new fence is worked out great! One issue I noticed immediately was that the old stamped steel wings were no longer stable after removing some of the bolts to make the new fence fit. Plus with the longer rails, I felt like I was missing out on additional work area. So to the solve that problem I made two new wings. The left wing is roughly the same size as the old wing, while the right wing takes full advantage of the new rails.

wing_bottomConstruction was very straight forward. Looking at the bottom, while fuzzy, should give an idea of how it is constructed. The bulk of each wing is two pieces of 3/4″ mdf laminated together to make a surface that was 1 1/2″ thick. Notice all the screws on the bottom. Before any glue touched the MDF, I predrilled and prescrewed each screw to make the pieces lined up properly, and to make sure that the top piece didn’t lift away from the bottom during glue-up. After glue-up came the edge banding. The edge banding serves two purposes here. First it makes a clean looking edge. Second, and much more importantly, it provides the structure to bolt the wings to the saw and rails. I intentionally made the edge banding wider than 1.5″ and initially attached them proud of the top surface. I only attached two bands at a time using glue and nails. Once each of the bands were attached and the glue was dry, I flushed them up with the router using a flush trim bit. After completing the edge banding, I covered the top of each wing with a sheet of Formica, using contact glue and a j-roller.

Finally came time for installation, and this was actually the most time consuming part of the project. After getting a wing lined up as close as possible, I would mark the two outer bolt holes. I then drilled the through hole. If you look in the picture around the edge you will see large holes in the bottom. These were drilled using a forstner bit, and then using a chisel and hammer, made a flat surface for the nut & washer to bite into. After cutting each of these (8 in all) a lot of time was spent with lining up with wings. This included widening the through holes with a rasp, tightening and loosening bolts, and finally some brute force with the rubber mallet. After finally getting everything even, I did a final check to make sure all the bolts were good and tight.

Update 3/6/2013 – I have been using the setup for not quite 2.5 years now.  The wings have worked out fairly well, and do occasionally need readjustment.  The fence has been great!  I do try to keep the guides as clean as possible and well waxed.  The fence still glides as smooth as the day I installed it.  There was a point about a year ago that I thought I was going to have to replace the saw.  Luckily the issue was repairable, and the saw is still useable.  However, if I had to replace the saw, most likely that fence would have been put on the replacement saw.

A great time in the shop…..

Published on by Mike  (Leave a comment)

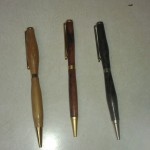
2013-04-04 21.35.02  Woodworking is often an activity of solidarity.  However, that does not mean we as woodworkers want to be alone in our shops.  In fact, I love it when I have a guest in the shop, not just to show off what I am working, but perhaps to also have them try something new as well.  The best times are when one of the kids spend time in the shop with me.

Go back a few weeks ago, my step son happened to glance through a copy of the Penn State Industrial catalog.  Being the typical teenaged male, he has a fascination with guns, and he found a pen kit that is made from a bullet shell.  He asked me to make him one of those pens.  I turned it around on him and told him HE could make one himself.  With the help of a friend (Thank you Jerry!) I started procuring everything I needed to turn a pen.

After I got everything needed I made a few test pens on my own, as I have not yet turned one myself!  Finally during his spring break as he was feeling a bit board I called him out to the shop.  This isn’t the first time he has been in the shop as he has helped me in the past, including operating a few of the machines in the shop. This, however, would be the first time he turned something.

Once I got him out there, I had him pick out a blank, and stepped him through the process of prepping the blank.  During the process, he was indifferent to it (okay, down right bored, lol), as most of these operations he has done many times before until we finally we get the blanks on the lathe.  After a thorough safety discussion, I have him start slowly start turning.  He starts taking very light passes, and over the next few minutes the square blanks start becoming smooth cylinders.  This is when he starts getting very excited about his progress!  He progresses from turning to sanding, and finally to the finish.  What really made him excited was that the final assembly was fairly quick and easy, and in the same evening he would complete an entire pen!  His excitement that he made his own pen was uncontainable!

2013-04-03 20.15.48The next evening, after showing off his first pen to everyone he could, he had a few orders to make some more pens.  So we started out at Woodcraft where he picked out several more blanks and a couple more pen kits to match the orders for pens he received.  This evening, I set him a bit more free on the lathe, standing by if he had any questions, or if I need to show him a better way to accomplish something.  It really was an awesome feeling watching him take what I showed him the previous evening and build on it.  He started experimenting with the tool, getting a better feel for what it is capable of doing, even to the point where he could tell the tool was ready to be resharpened.  The result of this was he turned two more very well done pens, that he was very proud to deliver to their intended recipients that same evening.

I am really looking forward to getting to spend more time with him in the shop!  I know I will cherish every minute he is out there with me!


New Table Saw Fence – Part 4 – Installation

Published on by Mike  (Leave a comment)

fence_doneI didn’t take any further pictures during the install process, except for the final product (as shown) as from this point the installation was exactly as described in the manual and it went in fairly quickly. Much of the time spent was with tuning the fence. Which I did even further the next morning as well, until I was happy with the setup.

One unexpected benefit was the power switch placement. It no longer faces down, but instead faces up. I did move it out a little bit further I was fearful I would accidentally turn the saw off mid cut by leaning into it. However the bracket mounted right onto the angle iron by using one of the bolts that hold the tube rail to the saw.

For the cost of this fence (being less than half of many of the popular high-end fences) I was really impressed with the feel of it. It glides over the rails with very little force, despite it being fairly heavy. The measurement guide is very easy to line up, and leaves very little doubt to the accuracy of the cut. Finally, since it use a similar clamping mechanism to the Biesemeyer, it ALWAYS locks down square. Even though the saw itself is 25+ years old, this upgrade has made the saw feel like it is new.


New Table Saw Fence – Part 3 – This is only a drill!

Published on by Mike  (Leave a comment)

drill_jigBefore I started drilling holes, I did a bit of research on how others had done it, namely drilling holes in the angle iron or into the front and back sides of the saw’s cast iron top.  While many had drilled into the angle iron, I was concerned about revoking the 2 year warranty, and also realized my little bench top drill press was not up to the task of drilling.  I decided it would be much safer to attempt to drill into the cast iron.

While I did not come to the decision of drilling through a 1/4″ of cast iron lightly, I figured I could use a jig to more accurately and more safely get the holes I needed. The other benefit was I was able to use the specialized screws that came with the fence for a more solid fit. I made a drilling guide using a scrap piece of hardwood, the width being about 1.5″, which matched the width of front and back of the saw. I marked as best I could where the hole should be on the guide, and drilled the guide hole using the drill press. From there I used trial and error until I was able to drill a hole that I could stick a bolt through to a whole in the saw, and the tops would be flush. You can see in the picture where I marked the successful one. I then lined up the hole to the red mark on the table and clamped it down good and tight. You will also note in the picture the bottle of machine oil. I coated the drill bit with the oil before I started to drilling, and several times during drilling.

new_holeFinally, after taking a good deep breath, I started to drill. The first hole took about 5 minutes to cut through. Now, this is the first time I have drilled through cast iron. I was therefore taken by quite the surprise when the drill bit finally cut all the way through, and instead of sliding through like drilling into wood, the bit caught in the cast iron, yanking the drill out my hands. I was very fortunate that I did not get hit by anything, and nor did the drill or bit break in this process. The second hole I drilled took quite a bit longer to drill as I did not want this to happen again, with potentially more disastrous results. I did discover that just before the drill bit broke through there is a lot more vibration as a warning to slow way down and therefore was able to drill through this time without incident.

For the back rail, I decided it was best to use one existing hole and only have to drill one more hole. With the difference being only one inch I was not really losing anything by having both rails being lined up. The third and final hole I was able to drill the quickest, and was able to drill through without incident.