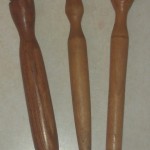
Turnings 3, 4, & 5 – Marking Knives

Published on by Mike  (2 Comments)

I am getting ready to take a class at my local Woodcraft to learn to how to make hand cut dovetails.  Most of the tool requirements listed I already owned.  One of the exceptions was a marking knife.  I decided to give it a try at making one.  I bought a couple pen blanks of Brazilian Cherry as I really liked how the finish came out on the hand plane tote and knob.  Alas the first attempt at the first knife ended in disaster.  When I went to drill the hole for the blade tang, the piece split all the way down.  Bummer!  So I started over, and once I got the handle turned, I drilled progressively larger until I got to the size hole needed.  After epoxying in the blade and playing around with it, I realized the blade was too short and way too wide to be practical for marking dovetail cut lines.  I decided to try again, but this time used some scrap cherry left over from the chisel rack.  This is a much narrower handle, for a much narrower and longer blade.  This should be much better suited for cutting dovetails.  The last one was made as I had made an experimental blade before doing anything for real.  Even the it is beveled for a lefty and I am right handed (oops) I decided to make one more handle for this one.

Also, I made the blades from a demolition reciprocating saw blade, which is about 1/16″ thick piece of metal.  I used my Dremel to cut the metal, and grind and belt sander to do the shaping and beveling.  I then sharpened them like I would any other blade.

Turning #2 – Hand Plane Knob

Published on by Mike  (Leave a comment)

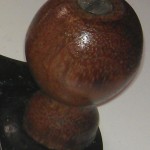
This was for a plane restore that I discuss in an earlier blog post, which can be found here.  I actually bought a bowl turning blank that if I recall correctly was a 6″x6″x2″ piece of Brazilian Cherry.  The purpose of using a big piece like that was so I could get both the tote and knob from the same piece of wood.  I cut a 2″x2″x6″ piece with my band saw.  Had I done this today, I would have cut that piece in half for another turning project.  But I still was real confident about getting the sizing right so I used the hole piece.  The finish on this is boiled linseed oil and several coats of shellac.  I was MUCH happier with the finish on this piece then I was on the last one.

My First “Practical Turning” – A mallet

Published on by Mike  (Leave a comment)

About this time last year my Dad gave me vintage Delta lathe, that I have figured out to be the Delta Double Duty 955.  It came with a lot of worn out turning tool, all of which were too small to be practical.  I still have them, but they do not get used much.  So that I could start the process of learning how to turn, and learning how to sharpen turning tools properly, I went against my rule of not buying cheap tools and bought a very cheap set from Harbor Freight.  I still take much flak for this today.  🙂  The sad thing is, they work better than even I thought they would, and I am still using them today!

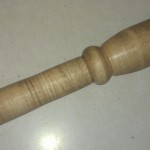
After turning several pieces of wood into saw dust, I decided I would try something small, but potentially practical.  I had just completed the purchase of my chisels and decided I could use a good chisel/carving mallet.  I wasn’t really ready yet to try spinning a big piece of wood, so I made a small one.  A very small one.  🙂  So in reality it is too small to be practical, but someday I may have a use for it.  It was turned from a 1.5″ x 1.5″ x 12″ piece of maple turning stock.  It was my first attempt at finishing on the lathe, and I had not yet found the joy of using boiled linseed oil with shellac.  I ended up staining and putting a poly finish on it.  The finish ended up burning on the piece.  If any thing, it made a neat effect.  🙂

Adirondack Chair

Published on by Mike  (Leave a comment)

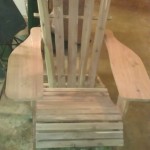
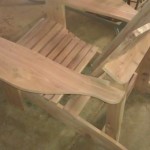
I built this chair following along with The Woodwhisperer Guild build of a Green  & Green style adirondack char.  While it is a traditional design, many of the tips given by Marc still applied while building this one, such as how to position where the screws for the back slats. If i hadn’t caught that video, I guarantee you I would have had a screw or two blow through.

The only issue I ran into was I should have cut my boards down sooner after planing. As stresses released, and the dramatic change in humidity I ended up having a couple boards that badly split. The adjustment I made as a result, otherwise, i wasn’t going to have enough wood is the number of back slats. The plans called for 7, I made 5. It was either that, or not have enough for the seat slats.

However, as you can see in the pictures, the chair is very comfortable to sit in! It was a fun project to complete!

Smoothing Plane Restoration

Published on by Mike  (Leave a comment)

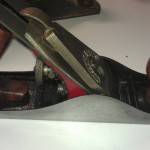
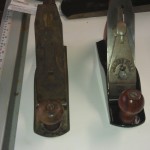
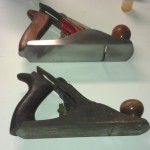
Awhile back my Dad gave me two smoothing planes (Stanley #4 equivalents).  Today I finished restoring the first, which is a Miller Falls 9.  The main body and sole I used sandpaper on a granite block, from a really low grit to get the rust and tarnish of all the way up to 2000grit to get a mirror like finish on it again.  The plane was well used by its original owner, so it will never be perfect again, but I think I got it looking pretty good.  For the parts that the sandpaper method would work, I used evaporust.  That stuff is great, as it works well, and is non-toxic!  The knob and tote were in bad shape.  The wood was very dry with a crack in the base of the knob.  I was concerned that they would break.  So I bought a 6″x6″x2″ turning blank.  Used the band saw to get a 2″x2″x6″ turning blank that I cut down and used to turn the knob on the lathe.  I resawed the remaining piece on the band saw, cut a blank to size for the tote.  The tote was a real challenge to make, and took a lot of hand work to get it to the right shape.  However, I believe the effort has paid off!  I have included pictures of both smoothing planes, as they were both in pretty much the same bad shape when I got them, including the paint on the bottom!