Hand Tool Cabinet Update – Door boxes!

Published on by Mike  (Leave a comment)

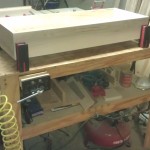
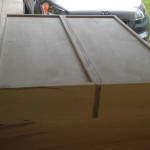
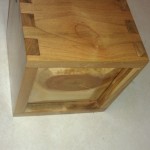
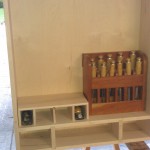
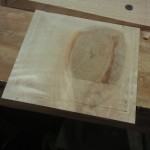
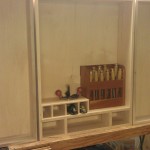
2013-05-05 17.54.26    So this past weekend I made quite a bit of progress on the hand tool cabinet, with the completion of the boxes that will make up the doors of the cabinet.  The doors are boxes as they are intended to be additional storage for my growing hand tool collection.  This was actually my second attempt at making the doors.  The first attempt did not end so well, as when I was cutting the grooves in the long boards (the sides) that would house the plywood backing, I had a mishap on the table saw.  I finished cutting the short boards (tops and bottoms) and I must have inadvertently hit the locking lever for the fence.  Not enough to completely loosen it, but enough to move it each time I pushed a board against.  Thankfully no kickback, but the result was each of the long boards had a groove incrementally further into each board.  After thinking through my options, I decided that the boards I had just worked on can be used for other aspects of the cabinet, so they will not go to waste.  Another aspect was the color of the ambrosia maple had a lot of dark areas in them, so it wasn’t a great match to the existing cabinet box, as well as making some dumb mistakes with wood selection.  So lessons learned, I went back to my hardwood supplier, and took more care in what I selected for the doors.  Armed with new wood, I milled the boards.
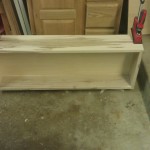
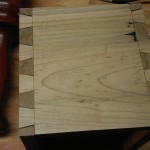
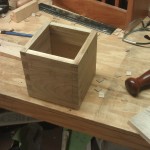
2013-05-03 22.33.292013-05-03 22.33.37The boxes are a fairly simple construction, with rabbets on each of the side boards, and grooves to hold the 1/2″ baltic birch plywood for the backs.  After getting the pieces sanded, and dry fitted a couple times, I glued them up.  I ended up only using two clamps for each cabinet, as I had an easier time getting the boxes square.  The two clamps held everything tight enough, resulting in tight joints.
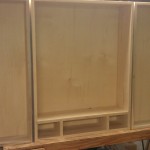
2013-05-05 17.51.592013-05-05 17.58.59The next step in the project is to build the false fronts for the doors.  These will be frame and panel fronts.  I am thinking once those are done and on the doors, I am going to apply the finish to the cabinet and doors, and go ahead and hang it.  The reason being, is it is big.  🙂  Storing it while it is being worked on has become difficult.  Once that is done, the rest of the components needing made are relatively small.  I do realize that this puts this at risk to never being done.  However, it truly never done, as it will always be modified and added to as I continue to add to my hand tools.

Box Challenge – Finished!

Published on by Mike  (Leave a comment)

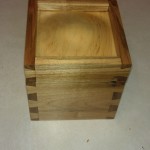
2013-04-19 23.20.46 Despite the fact I long missed the deadline of the original challenge, I continued to push forward on getting the box complete.  Now that the weather is warm(er) I am getting out in the shop more.  While my main focus in the shop is the hand tool cabinet, and Erick turning pens, I didn’t forget about the box.

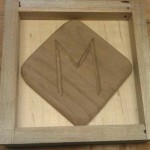
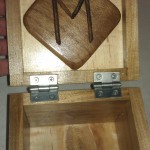
2013-03-10 20.54.31In my last post I mentioned that the box was almost completed, that I had an idea to cover the hole left from the wood worm screw from when i used the lathe to make a domed top.  What I came up with is a sort of medallion made from a small piece of walnut with my initial “M” on it.  I don’t really have any carving tools.  I ended up using my trim router with a V groove bit and free handing the M over layout lines I drew on the work piece.  I then simply used my bench chisels to straighten out the lines of the M.  I then attached to the bottom of the top, resulting in no more ugly hole!

2013-04-19 23.21.12About a month ago I put a couple coats of boiled linseed oil on the box, and I let it set.  Since we were getting days consistently over 50 the boiled linseed oil slowly cured.  From that point I started wiping on shellac.  I believe I put on 5 or 6 coats of shellacs, till I got the look I was going for.

Now that the finish is on and done, I am really glad I paid close attention to the grain of the wood.  Where the grain continuing around the entire perimeter of the box wasn’t real noticeable, with the finish, it really pops out.  The effect really cool.

2013-04-19 23.21.30As with any good challenge, I learned a lot on this, and strengthened many skills.  While my dovetails still have room for improvement, I feel I now have the confidence to use them in more projects.  Also worked on my hand plane skills when I raised the panel on the bottom .

Looking forward to the next challenge project.  Maybe I will even finish that one on time!  Thank you to Roger for hosting the challenge, and thank you to

Spring is coming soon…… Please hurry!

Published on by Mike  (Leave a comment)

2012-09-23 18.45.19So, it is early March, and reflecting back on the winter we had, it was COLD!  I do have a kerosene heater that I can warm the garage, but it is only effective if the outside temp is over freezing.  Most any day I can get it tolerable to be in the shop with a sweater or jacket on, but if I can’t get it into the mid-50s it isn’t worth it.  First, I don’t like working in the shop with long sleeves on, for various safety reasons, as well as I feel like I can move more freely when working with hand tools.  Next, and yes on this one I am being a wuss, but cast iron and tool steel is COLD and uncomfortable to work with!

2013-01-30 22.44.46That said, I am starting to think ahead as to what I will be working on this spring.  First off, I want to finish the box for the box challenge.  It is nearly done, but I have an idea of a detail I want to put inside the lid first.  I will post here how that works out.  Once that is done, I will mortise out for the hinges and once the outside temp is steady enough, put some finish on it.

Next, I want to finish my hand tool cabinet.  I made a lot of progress on it last fall, and it has been sitting on saw horses waiting for me to get back to working on it.  One thing I have been thinking on is the drawers.  First, I want to do hand cut dovetails with them again.  One thing I am tempted to try is making them half blind.  I will have to do some more research on it.  The other thing is, I want the drawers to be unique.  I have been thinking about getting a small amount of some sort of figured exotic for the fronts.

As for other projects, I have a few ideas in the works, as does my wife.  🙂

A day of zen in the shop

Published on by Mike  (Leave a comment)

2013-01-19 18.22.49As mentioned in a previous post, I have been working on box that was part of a challenge in the chat room for The Wood Whisperer.  While I missed the deadline to get it completed for the trade portion of the challenge, I still have every intent to finish it.  There have been a lot of firsts on this project, with far more hand tool work done on this, including hand cut dovetails as the primary joinery for this project.

That brings me to my day of zen in the shop.  Most days I spend in the shop are good days, but this day was one of the best days.  During this day, I did not use a single power tool.  The only electrons abused were the ones powering the lights in the shop.

So, what did I accomplish during this day of zen in the shop?  I finished cleaning the tails, cut out and cleaned up the pins, and fitted all 4 corners of the box.

Just me, a dovetail saw, a few chisels, a mallet, and four pieces of wood, with some classical music playing.  Does it just get any better then that?  Well, yes, it does.  When I brought the first corner together first time.  The fact that it slipped together with some light taps of the mallet.  Even better?  Doing it 3 more times!  After doing a little more cleanup, I had a box that was reasonably square.

Since the day of zen, and the previous post, the box parts were sanded, glued together, and the lid separated.  Still some work to do on it before putting the first coat of finish on it, including a little more hand tool work.  Perhaps another day of zen in the shop?

Get Woodworking Week Post – Box Challenge Build

Published on by Mike  (Leave a comment)

2013-01-30 22.44.46 Since my shop is in a garage, and in Ohio, I am don’t know that I will get much if any woodworking done this week.  Much of it depends if my kerosene heater can compensate for cold air outside.  However, I think it is worth talking about my current project, which is part of a box challenge that a group of us are participating in.  The idea of the challenge is to build a box that pushes your skills.

2013-01-19 18.22.49The first skill challenge for me was hand cut dovetails.  I took a class a couple years ago, and made several practice bookends, but never actually did a project with DTs on all four corners.  The answer to the top question is tails first.  🙂  I spent a lot of time being extra careful, with both the DT saw and chisels to get the joints as clean as possible.  The only area that I consistently had issues with were the half pins on the ends.  This is where I had the worse gaps.  The rest of the DTs ended up reasonably tight.  I haven’t glued the box up yet, so I have decided yet how I will close up those gaps.

2013-01-30 22.45.05After completing the four sides, I started working on top and bottom pieces.  The top I ended up doing a square turning to make it domed shape.  The I started working on the bottom.  I couldn’t bring myself to just making it from plywood.  It had to be solid wood.  I started out just rabbeting the bottom piece to fit in the dados in the sides.  I didn’t like how it looked.  So I grabbed my #3 and started working away at it.  I marked some guidelines, and next thing I know, I had a raised panel for the bottom!

2013-01-19 23.04.08I still have some work to do on the box, and any more work I do on it this week, I will update as another GWW post.