Shop Tip – Blade Cleaning

Published on by Mike  (4 Comments)

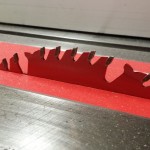
Saw Blade If you get to a point where your table saw blade isn’t cutting as well as it used to be, such as burning and leaving a rough surface behind, the blade may not be dull.  The blade may simply need cleaning.  What happens is you cut different materials, especially those with resins and glues in them, you will start to get pitch building up on the blade.

There are several products out there that will clean the blade well.  The one that I have used is white vinegar.  I put the blade in a shallow pan, and the poured enough of the white vinegar enough to cover the blade.  I let it stay in the vinegar for 30-60 minutes.  I don’t want to leave it in much longer than that as the vinegar will cause the blade to rust.  I then used a paper towel to wipe down the blade.  The pitch and residue wipes off easily.  The vinegarVinegar is acidic, so I sprayed the blade down well in the kitchen sink.  Note, do this when the wife is away!  🙂  After rinsing it off real well, I thoroughly dry the blade.  Once dry, I put the blade back on the saw, and make a few test cuts.  This serves two purposes.  First it makes sure that the blade is completely dry.  Second, the test cut will show that the blade is cutting proper again.  If the blade is still cutting rough and burning the stock, it maybe time to get it sharpened.   Most times cleaning the blade will be enough to get it cutting well again.

Tool Review – Woodworking Tape from Avery Dennison

Published on by Mike  (2 Comments)

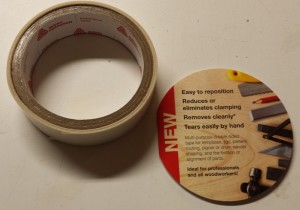
Avery Dennsion Woodworking TapeAt Woodworking in America’s 2013 show, a representative from Avery Dennison was handing out free samples of a new product they are introducing, specifically for the needs of woodworkers.   I have had several projects where I have had to double side tape two like parts together, or a template to roughed out part to flush trim on the router table.  In the past I have used carpet tape.  While carpet tape works, it can be very difficult to separate and often have to clean up the work pieces with a good sanding.  Also, once you separate the carpet tape it may not be reusable as it went with the work piece or just doesn’t hold well afterwards.  Also, carpet tape requires scissors to cut each piece off as it does not rip easily.  Overall, carpet tape really is not an easy to use product for woodworking.  Avery Dennison’s new product states it will solve all these issues.

So my current project, requested by my wife, has a lot of the same parts, each with a bunch of curves that need to reproduced many times over.  This was the perfect opportunity to put this tape to a test.  First off, the tape rips very easily, so there is no need for scissors, which makes getting the pieces needed go very quickly.  Once getting the work pieces together, about 6″x13″ there tape held solid laterally.  I did several pieces on the router table with the flush trim bit, and every one of them came out perfectly.  While the tape is designed for lateral strength, it is still easy to pull the work pieces apart.  The tape is designed to stay on the first surface when you pull it apart so that you can reuse it on the a template fairly easily.  For the most part I found this to be true, but did have one case where the tape stayed on the other piece.  Once done, the tape pulled off the template very easily, and neither the template or work piece had any residue left.

I will mention, this tape is meant for lateral strength only.  It is not meant for and should not be used to hold two pieces together for use on the lathe.

Looking at the availability on Woodcraft’s website they sell it in two different sizes, 1″x50′ and 2″x50′.  The sample pack was a few feet of the 1″ wide tape.  The only real drawback is that the tape is more expensive than carpet tape ($19.99 and $29.99 respectively).  However, I do believe the benefits it provides do justify the cost.  I know I will be buying another role soon.

More New Tools – And Safety is King!

Published on by Mike  (Leave a comment)

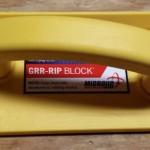
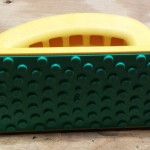
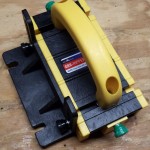
GRR-Rip Block GRR-Rip Block Bottom     Recently I attended Woodworking in America, spending some money at its market place.  Then the following weekend my local Woodcraft had its annual Extravaganza, where they have their paper bag sale as well a few vendors providing demonstrations.  In fact I saw the same guy both weekends from MicroJig as a result of these events!  When it comes to affordable machine safety, these guys know what is going on!  I have had their splitter on my table saw for awhile now.  However, I hadn’t yet bought their very popular Grr-ripper.  GRR-RipperWhile at WIA, they were demoing their newest product the Grr-rip Block.  What really sold me on it is the smart hooks that are their when you need them, but are out of the way when you don’t, which is awesome when pushing a piece through the jointer.  In fact they work the same way on edge when resawing on the band saw!  So while at WIA, I bought one!  I get it home, and the grips are amazing.  I was so impressed with it that next weekend, I bought the Grr-ripper at Woodcrafts event!

Gramercy RaspAnother WIA purchase was a Gramercy rasp.  I got their smaller 5″ 25TPI rasp.  While I haven’t used it on a project yet, I have played around with it, and it is an awesome tool!  It is hand stitched, and made from stainless steel so it won’t rust.  As much as I reach for a rasp or file, I have a feeling this one will get a lot use!

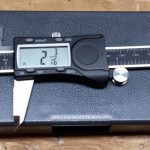
CalliperI also picked up a digital caliper.  I actually bought one last year, but met an unfortunate demise when the chuck key for my lathe chuck landed right on the display.  It never worked right since.

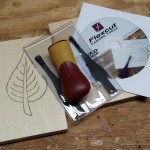
Last but not least, while at the Woodcraft extravaganza, I entered my clock on their gallery, and took third place in the small projects division.  The prizes for that was a Fein ball cap and safety glasses, as well as Flex Tools beginners carving set.Carving Prize  Fein PrizesThat is an area of woodworking I have yet to explore, so who know perhaps you will see me posting a project with a carving in it sometime in the future!

Just a few thoughts

Published on by Mike  (Leave a comment)

pennythoughtsOne of the many things bloggers thrive on is the feedback they receive on their various blog posts.  Recently Tom Iovino, on his blog tomsworkbench.com, listed my blog as his blog of the week!  I have met up with Tom at this year’s and last year’s Woodworking in America shows.  He has a lot of energy and passion when it comes to woodworking and the online community surrounding it.  He is also one of the hosts of The Modern Woodworker’s Association.  Thank you Tom for all you do!

Also, as comes to feedback, I make an effort to reply to every comment that I receive on my blog.  One thing I realized  is that a commenter doesn’t necessarily see my replies without having to select to see all future comments.  I have made an update to the blog software that an email notification will be sent to commenter that I have replied to.

Right now the weather is starting to turn cold, and while my shop isn’t year round climate controlled, it doesn’t mean the woodworking stops for me.  I am planning on some Christmas projects and I still have the drawers for the hand tool cabinet to make.  So from a project standpoint, I have more coming.  I am also working on trying to post more tips and tricks as I come up with them.

Thank you for taking your time to read my posts!

Mantel Clock – Design Reflection

Published on by Mike  (Leave a comment)

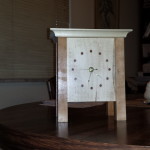
2013-10-20 16.33.45   The clock was an experiment for me.  Some of my earliest projects, I never used any sort of plans, except for maybe a quick drawing on paper.  The projects were either extremely simple…..or just didn’t end as well as I expected.  What really helped me increase the quality of my projects is drawing them up before hand with sketchup, and every major project I have done for the past 3 years I have made a drawing for.  During this time, I like to think I have become a better woodworker by pushing my limits when I can.  This project, I pushed my limits by using no design whatsoever, not even a napkin drawing.  I did take inspiration from photos, and some help from my wife.

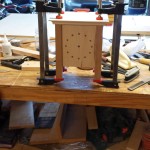
2013-10-13 16.01.51Part of the design challenge was also having elements in it that allowed me to use new techniques that I have not tried before.  This turned out to be resawing on the band saw to make the 1/4″ thick panels.

As for the design itself, after I laid out and drilled the holes for the face, I was concerned I made the face too big for the clock.  Looking at the finished product now, especially since I simplified the top, I am happy with the size.  2013-10-12 13.25.49The one thing I would change on the design is the columns.  I think I would have liked slightly thicker columns so that I could have made the tapers more pronounced.  Even an 1/8″ thicker I think would have made a big difference.  The top was a tough one.  My vision was originally to make it much more ornate.  However, once I got the first layer on the clock, I really liked the cleaner look of the flat top, so I stayed with it.  The only other thing I would have changed, is the back.  My scroll sawing experience is still very small, and I wish I could have made the cuts a bit more straight.

2013-10-06 16.10.56Overall, I feel this experiment was successful.  I like how it looks sitting on our mantel, and the feedback I have gotten has been very positive.  Also I did enter it into my local Woodcraft’s gallery, in the small projects division.  I am happy to report, that the clock took third place in that division!  Will see what I come up with for next year’s gallery!  🙂