Evolution of my shop

Published on by Mike  (2 Comments)

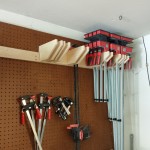
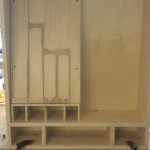
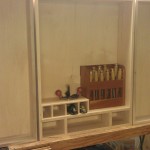
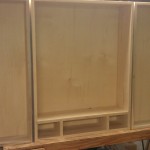
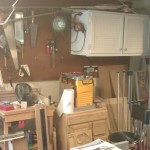
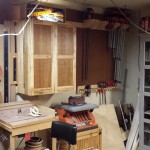
2013-06-08 16.06.27Yes, I know, my posts drop off when I am working out in the shop.  However, the time between my last post and this one has not gone to waste!  There have been quite a few changes in the shop!  Every shop is a constantly changing environment.  When we first moved into this house, most of my tools were small and portable, and I would take them out to the driveway and work.  Most of the projects I undertook then were home improvement/repair related, and a few other smaller woodworking projects which were well perforated with brad nails.  (Sorry Norm)  The white cabinet on the wall I made for power hand tools, and really was the first storage towards my shop.  It was perfect for that use, and was on the wall for quite a few years.  Everything else I had was well stored on the peg board around it.  However, as my interest in woodworking grew, and my projects became more sophisticated, my tool needs changed, and therefore my storage needs changed.  Now if you told be 3 years ago that I would have a hand tool collection beyond a set of chisels, I would have laughed.  However, that soon changed, and my hand tools started growing.  Quickly.  🙂  So that is how and why the hand tool cabinet project began.  Other storage needs had also cropped up besides hand tools.  Last year I started buying clamps.  Real clamps.  Not the junk i had bought from a discount store a few years ago.  In fact I have started buying Bessey Revos and Bessey F-clamps.  The nice thing about the Revos, they do stand up on their own.  However, they do take up a lot of floor space, and honestly, I have knocked them over more then I care to admit.  So, wall storage was needed as well.
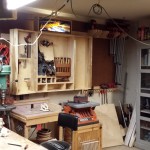
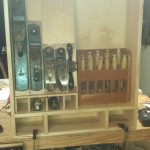
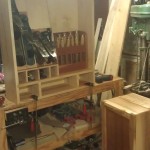
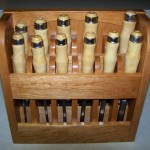
2013-06-24 23.08.322013-06-22 14.58.54So, now the hand tool cabinet is up on the wall, and my still growing collection of hand tools are stowed away in it.  Each tool, that didn’t end up on the plane till or in the chisel rack all had custom hangers made for them.  I eventually want to put a saw till in the right door, but with just the one dovetail saw and the one Japanese saw, I decided to leave that for a later project.   I still need to make the drawers for the cabinet, but those will come later as well.  I also made two clamp racks.  The first one is for the k-bodies.  If you notice, it is intentionally only half full.  I am not buying those clamps yet.  🙂  I also made a rack down lower for my smaller clamps, including the F-Style clamps.
2013-06-24 23.08.05I dare not call the hand tool cabinet finished.  I don’t think I will ever call it finished, as it is meant to grow and change as  I do in my woodworking.  So don’t be surprised if 5 years from now if I still make the occasional update on it.  For now, on to the next project!

Oh, and the white cabinet did not go to waste.  My Dad took it, and is going to use it in his garage.

Hand Tool Cabinet – Lots of progress

Published on by Mike  (Leave a comment)

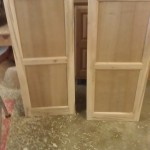
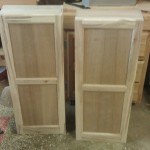
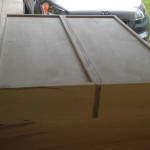
2013-05-17 18.33.48After completing the door boxes, I started working on the false fronts.  The false fronts are actually serving 2 purposes.  The first is to make the cabinet look nice when the doors are closed.  The second is to hide any potential screw or nail penetration.  2013-05-25 17.39.50The back of the door boxes is 1/2″ baltic birch ply and is meant for me to hang tools off of.  So, it is very possible a screw may poke through, which the false fronts will hide that.  The false fronts are made with a frame and panel design, using an ogee style router bit set.  The panels themselves are cherry plywood that I had left over from the cradle.  This adds a nice contrast to the ambrosia maple from the rest of the cabinet.

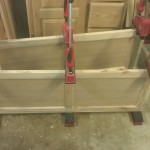
2013-05-25 17.39.58Once I had those completed, I readied the table saw to cut a rabbet around the entire perimeter of the fronts so that they would fit into cavity left for them in the door boxes.   After getting getting it setup and making a few test cuts, I decided to not do the rabbets.  The reason being is I realized this was going to look funky where you could see the joinery.  While it was not going to be that obvious, I felt it was still an issue.  Using some thin pieces of scrap, I attached them to the underside of the fronts to use to line them up.  I applied the glue and clamped them up.  I made the fronts over-sized to the door boxes so that there was an 1/8″ overhang on all sides.  I then used a flush-trim bit to flush everything up.

2013-06-01 21.18.39After getting that all done, I had a lot of sanding to do.  Therefore, I procrastinated.  🙂  I ended up working on the plane till to go inside the cabinet.  This was another design change from the sketchup.  The original design wasn’t really well thought out, and consisted of vertical slots for the planes, with no real  thought into keeping them in place.  I decided to go with one at an angle 2013-05-27 15.19.34that the weight of the plane would help hold it in place.  The back of the till is 1/2″ baltic birch ply screwed (yes screws) on to a couple rails to hold it in place.  I then proceed to make shaped spaces for each plane to sit in.  With the tight fit in the till, and the angle they are sitting at, they are secured in place.  I later even worked in a place for the spoke shave.  Right now I am working on figuring out where the router plane will go.

2013-06-01 21.18.29Finally I completed the sanding.  Sanding was, well it was sanding, and a lot of it.  I then decided it was time to proceed with the finish.  I covered everything, except the back of the main cabinet with boiled linseed oil.  After giving the oil a few days to cure, I sprayed the exterior portions (except the back) and wiped on the edges of the interior.  I decided it would probably be best not to shellac the interiors of cabinet and door boxes.  I was concerned that this would create some barriers down the road.

So, what’s left?  I need to get the piano hinges purchased and installed on the doors.  I then need to complete making the french cleats and the upper portion installed on the back of the cabinet.  Then the wall it is going on needs to be cleared off and the french cleat installed on that.  Then, I start loading it!  As I make further updates here on the blog as I make more progress.

Dealing with complex projects

Published on by Mike  (Leave a comment)

102_2864 Except for maybe the quick and dirty projects that we all sometimes just throw together in an afternoon, most every project presents its own unique challenges.  My current project, the hand tool cabinet, has relatively simple joinery, largely rabbets and dadoes, with some hand cut dovetails for the drawers.  The complexity in this case isn’t the joinery, the complexity comes from the number of individual pieces in the cabinet.  Based on the sketch-up drawing, there 49 pieces!  If I took the entire cut list and started planing down boards and cutting individual pieces to size, I would have created a confusing mess. Plus I would have parts laying around for weeks, even months, before I would be ready for them.  There is a good chance the piece has moved due to humidity changes, or the piece may no longer be appropriate due to mid-stream design changes.

2013-05-05 17.54.26Instead, I try to componentize my projects.  With the hand tool cabinet, this was very easily done.  For example, I started out with the main box.  I planed down only the wood I needed for that component.  From there, I either work on one joint (if a complex joint) or one joint type.  For example, the main box is put together using rabbets.  So, I start out concentrating on the main rabbets, not worrying about the dados for the shelf or for the back.  If I start thinking too far down the road of the project, it makes concentrating on the task at hand that much more difficult.  Once I get all my rabbets cut, I move on to the next joint.

For more complex joinery, I concentrate on one joint, typically two pieces of wood, at a time.  This is especially important when fitting more complex joints like dovetails, or even hand cut mortise and tenons.  As I get each joint fit, I expand out to the next one, and proceed until all the joints are fitted and square.  Revisiting joints as necessary.

I had someone comment once that my chisel rack would be to far above their skill level to attempt.  Even though my chisel rack was my first real foray into a more “fine” woodworking using real joinery and no mechanical fasteners.  My response back was to them that was simply not true.  As I had accomplished this project, and I still consider myself a beginner!  While there are definitely techniques out there that are best left to the master craftsman, there are many complex projects that a beginner woodworker can undertake, just by taking it one piece at a time.


Hand Tool Cabinet Update – Door boxes!

Published on by Mike  (Leave a comment)

2013-05-05 17.54.26    So this past weekend I made quite a bit of progress on the hand tool cabinet, with the completion of the boxes that will make up the doors of the cabinet.  The doors are boxes as they are intended to be additional storage for my growing hand tool collection.  This was actually my second attempt at making the doors.  The first attempt did not end so well, as when I was cutting the grooves in the long boards (the sides) that would house the plywood backing, I had a mishap on the table saw.  I finished cutting the short boards (tops and bottoms) and I must have inadvertently hit the locking lever for the fence.  Not enough to completely loosen it, but enough to move it each time I pushed a board against.  Thankfully no kickback, but the result was each of the long boards had a groove incrementally further into each board.  After thinking through my options, I decided that the boards I had just worked on can be used for other aspects of the cabinet, so they will not go to waste.  Another aspect was the color of the ambrosia maple had a lot of dark areas in them, so it wasn’t a great match to the existing cabinet box, as well as making some dumb mistakes with wood selection.  So lessons learned, I went back to my hardwood supplier, and took more care in what I selected for the doors.  Armed with new wood, I milled the boards.

2013-05-03 22.33.292013-05-03 22.33.37The boxes are a fairly simple construction, with rabbets on each of the side boards, and grooves to hold the 1/2″ baltic birch plywood for the backs.  After getting the pieces sanded, and dry fitted a couple times, I glued them up.  I ended up only using two clamps for each cabinet, as I had an easier time getting the boxes square.  The two clamps held everything tight enough, resulting in tight joints.

2013-05-05 17.51.592013-05-05 17.58.59The next step in the project is to build the false fronts for the doors.  These will be frame and panel fronts.  I am thinking once those are done and on the doors, I am going to apply the finish to the cabinet and doors, and go ahead and hang it.  The reason being, is it is big.  🙂  Storing it while it is being worked on has become difficult.  Once that is done, the rest of the components needing made are relatively small.  I do realize that this puts this at risk to never being done.  However, it truly never done, as it will always be modified and added to as I continue to add to my hand tools.

Tool Review – Grizzly G0555P, Polar Bear Series 14″ Band Saw

Published on by Mike  (2 Comments)

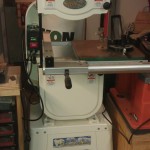
2013-04-20 20.25.15To try to bring more variety to my blog, and hopefully to help other newbie woodworkers make purchase decisions.  Most, if not all, of the tools I will be reviewing have been purchased for my normal usage.  However, on the very off chance someone sends me a tool to review, I will always indicate how I came by the tool I will be reviewing.  I think it is only fair to you, the reader, should know where the tool came from.  I will always try to minimize bias as much as possible.  Also, please comment with your good and bad experiences about the tools I review here.  This will make the review that much more useful for others out there.

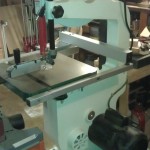
2013-04-20 20.26.20The first tool I am going to review is my band saw, specifically the Grizzly G0555P.  I purchased this saw early Spring of 2011, so I have had it for around 2 years.  Order and delivery were uneventful.  I ordered lift gate service, however with my lack of understanding that freight works bit differently then package delivery, I took the day off work for the date the tracking website said it would arrive, not realizing the arrival date was not to my home, but rather to the freight depot.  Not able to take another day off, I ended up driving up to the depot and picked the saw up from there.  Other then skipping out on the lift gate services, the freight aspect went smooth.

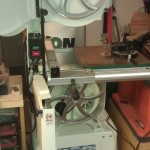
2013-04-20 20.26.30The saw and all of it components came well packed in one large box.  Unpacking was straight forward, and each component was well protected.  It did take two of us to lift the main saw out of the box.  Assembly was not difficult, and took me a few hours.  Most of the assembly was easily done by myself, but I did need some help lifting the main saw body on to the stand.  The instructions for assembly were outstanding, and made assembly go smoothly.  Tuning of the saw went well also.  The instructions were very clear on this process as well.  I will say, I did not use the blade that came with the saw.  From what I have read, the stock blade was okay at best, and others had recommended going with a better blade.  So I put a 1/4″ Timber Wolf blade on it, which has been the primary blade I have used on the saw.   First time I powered up the saw I was amazed at how quiet and stable the saw was.  It passed the nickel test with flying colors.

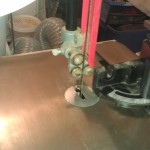
2013-04-20 20.28.35Overall, the fit and finish of the saw is excellent.  The only real negatives I have about the saw is on the guide bearings, and the fence.  Neither of them are truly bad.  The complaint I have with the guide bearings is that they are noisy.  They otherwise work fine, and do well with keeping the blade straight.  The fence is okay for most straight cut operations.  The lock handle is the main issue, as it sometimes doesn’t lock down as tight as it should.  I now always give it an extra push down to make sure it stays in place.  The fence adjustments for drift are not great.

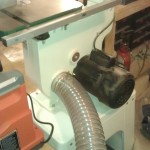
2013-04-20 20.29.00The saw has a single dust collection port in the back for a 4″ hose.  This does an adequate job clearing the dust from the machine.  Except for a little bit of dust left on the table after making a bunch of cuts, there is typically very little sawdust left in the saw itself.

The actual use of the saw has been outstanding!  Once everything was adjusted on a brand new blade, drift was virtually non-existent.  I have even cut thick bowl blanks on it, and the saw cut right through them with no issue.  In the two years I have been using it, has done everything I have expected of it, and never gave me an issue.    All in all, if I had to do it over, I would have no complaints buying this saw again.

Full product specs here

As a note, I do not yet have the rise block or mobile stand for the saw.  These will likely be future additions as I encounter the need for them.