A bright turning – A Table Lamp

Published on by Mike  (Leave a comment)

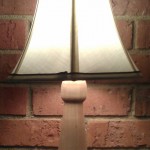
The lamp is yet another turning as my lathe addiction grows.  🙂  This was a challenging, but fun project.  There are actually three turnings total for this project.  The first is the main body, the next one is the base, and finally a small turning that is used to attach the electrical components.  All components were made from maple that has some (but not much) ambrosia figure in it.  The finish is boiled linseed oil and a furniture paste wax.

The lamp’s main body was made for four 3/4″ boards laminated together.  The two middle boards had a groove routed down the middle of them stopping an inch from each end.  The idea being that after turning the main body, that I could drill a hole from either end that would allow the wire to run through, and attach the electrical components.  The BIG mistake I made was I didn’t mark on the boards where the grooves were so that I could see where they were.  I just assumed they would stay center enough for this.  However, after glueing up the four boards, then jointing the edges, as well as trimming the ends, some how those groves became off center.  Not enough to ruin the final turning, but just enough that they weren’t useable.  Luckily  I was able to find a drill bit that I already had that was long enough to meet in the middle, and was able to finish the drilling on the drill press.

The base of the lamp was turned from a rough 4/4 piece of maple.  I flattened it on one face with the jointer, then straightened one edge.  I wasn’t concern about squaring up the piece, just so I had a good edge to cut it to length on the miter saw and attach to the face plate.  I roughed out the round pattern on the bandsaw.  Once on the lathe, it was no problem getting the piece perfectly round and getting the face opposite to the faceplate parallel.  Since this was a flat piece, with grain running perpendicular to the lathe, using spindle gouges was out of the question.  The only turning tool I was able to use for this was my scraper.  The main body had a large tenon, so I drilled mortise into the the base to accept the main body.  Then I drilled a hole through the side of the base to allow for the electrical wire.

The hole at the top (and bottom for that matter) of the lamp body was 5/8″ in diameter.  I needed a reducer peg so that I could put a threaded nipple into it.  So I turned one to 5/8″ then drilled a hole just over a 3/8″ in diameter.  The 5/8″ main hole was big enough to allow the nut and washer to fit, so it made attaching the threaded nipple a breeze.  Before I glued in the reducer peg I attached the nipple to it.  I SHOULD have ran the electrical wire through it first, as it would have been much easier to get pushed through.  I didn’t but after a bit of rigging, I was able to get the wire pulled through.

The electrical components were for the most part were taken from an old lamp that was falling apart, though I had to buy a couple pieces from Lowes.  The lampshade was bought from Target.

My wife is delighted to have it now.  The room we have it was always a dark room because of the large brick wall for the fireplace.  Having the additional light in the room makes a big difference for the overall lighting in the room.



Video #1 – Shop Tour

Published on by Mike  (4 Comments)

This is my first video, ever.  It was shot using my phone, and edited with Movie Maker included with Windows 7, so the quality reflects that.  Enjoy!

Snowman – A Christmas Turning

Published on by Mike  (Leave a comment)

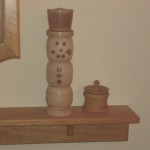
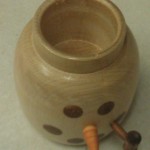
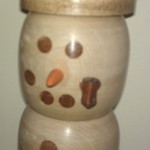
So the latest in my tool addiction is my lathe.  As an update, when I went to the woodworking in America show, I got a really good deal on the Delta lathe I had been looking at.  Since then I have been turning like mad.  My first project was a set of screwdrivers, which will be the subject of a future post.  The latest turning I have completed is this snowman.  Actually this is the second attempt actually, the first one turned out okay, but it took a little bit of imagination to see it as a snowman.  So I started out again.  First thing is I wanted some actual features (buttons, eyes, nose, mouth, etc.) on this one.  So the first thing I did was took some scrap Brazilian cherry and started turning it into pegs.  Several 1/4″ round and a bunch 3/8″ round.  In the maple blank, I laid out each segment of the snowman, including the tenons which will loosely fit into the next section.  I then laid out the position for each eye, mouth dot, and button, and drilled them out on the drill press.  From there I glued in the pegs, and let them sit so that they were good and dry.  From there, I cut each section of the blank free, and then knocked the corners off with the band saw.

The turning of each section was the same.  First mounted the top of the blank to the faceplate, and the rough rounded the blank.  I then drilled out about 1/2″ deep hole that I proceeded to further hollow out to size and shape, to both accept the tenon from the lower segment, and to fit on the jaws of my Nova chuck.  From there, I rounded the piece again  to make sure the piece was balanced, form the tenon, then form the shape of the segment.  I used my skew chisels to make the segment as rounded as possible.  I hollowed out each section with 1.5″ inch forstner bit.  Since I don’t have any hollowing tools yet, that is the furthest I went with it, but there is still some room for some small pieces of candy or other small items.  Finally each segment was sanded smooth.

The finish on the main body is simply shellac.  I wanted to keep the wood as light as possible (its supposed to resemble snow after all!) so I didn’t put any oil on it.  The hat I stained.  I wish I hadn’t.  If I make one of these again, I will get a dark wood for the hat that I can use oil and shellac to finish.

While the stain was drying, I decided to have some more fun.  I turned the pipe from two pieces.  This was a fairly challenging piece to turn since it was so small. The pipe was finished with boiled linseed oil and shellac.  Finally I turned the carrot nose.  The finish on this was orange marker.  🙂  After very carefully drilling the holes in the head segment for these, they were glued in place.

Overall, this was a fun and a challenging project that I have about 8-10 hours put into.  Some how I have a feeling this won’t be the last snowman I turn on the lathe.

Hand Plane – Edge Jointing Adventures!

Published on by Mike  (1 Comment)

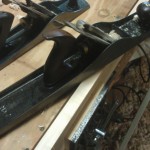
So, I have been making much more of shift to hand tool usage then I ever thought I would.  This was quite evident this past weekend when I pulled out my 100+year old Stanley Bailey #7 jointer plane.  My goal is to glue up 3 four foot long rough sawn boards so that I can a board wide enough for my current project.  Typically when setting up a glue joint, the best thing to do is send the piece over the jointer.  Unfortunately, the beds on my jointer (small bench top machine) are way too short to joint a 4 foot long board.  With a lot of messing around with stands I can make it work.  I bought the #7 jointer plane as an alternative to using the jointer.   The process I used below are mostly what I figured out using trial and error, and may or may not be considered best practices.  However, that is the great thing about woodworking, there are so many different ways to accomplish a given task!

Challenge #1 – Getting a straight edge

This is what the jointer plane is made for.  It does a great job at smoothing the edge, and making it straight.  Just like on the jointer, a few passes is typically enough to get the rough sawn edge smooth.  The length of the #7 (around 20inches) is what gets the edge straight.  As I progressed through the first board I worked on, there were several lessons I learned.  First, pushing a large jointer plane is a great work out!  This is a heavy plane, being pushed over a fairly good distance.  Next, the first indicator that the edge is becoming straight is visual.  The rough material will start to disappear leaving a smooth surface.  The second indicator is to listen.  When pushing the hand plane it is possible to hear when the blade is cutting or not.  When it is not cutting, that is an indication that there is a valley.  Once you can hear a non-stop cut, the board should be pretty straight.  Finally, check it with a straight edge.  The piece should be straight.

Challenge #2 – Getting the edge square to a face

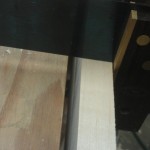
My delight of getting a straight edge was quickly turned into frustration when I took a square to checked the edge in relation to one of the faces, and it was no where near square.  Still being new to hand planes, I wasn’t quite sure what to do to fix this.  My first instinct was to simply tip the plane to start trying to bring down the high side.  I found this made thing worse.  As I started thinking through the issue, and with some help from the TWW chatroom (Thank you Roger!)  I realized that the various adjustments on the plane are for more then just making sure the blade is properly placed in the plane.  Frequent adjustments of both the depth wheel and lateral adjustment handle is what gets a good square edge.   When starting out with a rough piece, an aggressive cut is desired. However, pulling back the blade a bit helps quite a bit with making adjustments to the cut angle.  After several LIGHT passes, I check the edge with my square.  If I see a gap, its not square.  To deal with this, I lightly push the lateral adjustment lever slightly towards the side of the gap.  Making small changes is key here..  Keep repeating this process until the edge shows to be square.  I found that it is also good to check for square along multiple points along the board.  Make light cuts and check for square often.  Finally I found it is worthwhile to clamp the faces of the two boards that are going to be glued together, and make a couple light passes on the edges to be glued together.  This should make sure that a good solid glue-up for the boards.

Conclusion

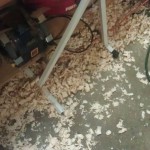
So after spending many hours playing with my plane, and creating a mountain of shavings, I finally achieved a couple straight and square edges that are ready for glue-up

Handcut Dovetails

Published on by Mike  (Leave a comment)

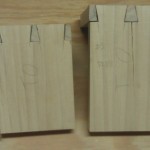
Book-ends 1 through 4
Dovetail Progress Book-ends 1 through 4

As I posted a few weeks ago, I attended a dovetail class taught at the local Woodcraft by the owner.  Since then I have been working on a few practice pieces to start getting the feel for cutting them.  The last practice piece I was working on ended with the best dovetail joint so f

ar.  The gaps are minimal, the fit is solid so that there is no play, and best of all, the two pieces are completely square to each other!  It was an incredible feeling knowing that I accomplished that using nothing but hand tools!

Now, if you talked to me a couple of years ago, I would have laughed at the thought of using hand tools, much less attempting cutting dovetails by hand.  First let me say, if I can do it, you can to!  The biggest thing I have learned, is not to rush!  That, and making sure all the tools being used are sharp and ready to go!  I know there are some videos out there that shows someone making a near perfect dovetail joint in

less than 10 minutes.  The last one I did took me over an hour to do.  While I have found myself getting naturally faster at some of the steps, speed is not the focus here.  The focus is trying to make a good clean dovetail, taking one step at a time.

I have decided that the next project I work will incorporate dovetails.  I will be sure to document it on my blog as progress through that.