Hey all, I have been playing with some settings and plug-ins on my blog. Hopefully my posts will start showing up on Facebook now.
Handcut Dovetail Class
Published on by Mike (Leave a comment)
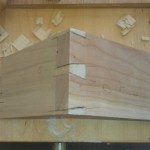
 Today I took a class at the local woodcraft on cutting hand cut dovetail. I had tried cutting dovetails on my own with less than desirable results. Admittedly I had tried with a dozuki, and I never could get a good feel for that saw. For this class, I decided to bite the bullet and buy a Veritas 14TPI dovetail saw, which I used today. It was money well spent! With a few minor exceptions, even though they had their tools out for us to use, I used my own tools. This was important to me as these would be the tools I would be using in my shop, I would be using to learn with.
The class was three hours long, but by the end of the class, I had made a solid joint. The gaps, while there, are small, and with some additional practice, I feel I am on the way to make solid dovetails! The photo shows the end results of today’s class.
Turning #6 – My Second Mallet
Published on by Mike (Leave a comment)
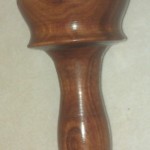
 I decided that after attempting to use the first mallet, I needed one that had a little bit of heft to it. When looking at the prices on some of the mallets on the market that were comparable to what I was wanting to make, I decided it was worth it to use an exotic blank that was heavy. In this case the mallet is made from a South African species known as Mopane. This stuff was DENSE and HARD. The blank was 3″x3″x12″, and easily weighed 3 pounds. I bought two other blanks of the same size at the same time that were maple and cherry. The mopane blank was heavier then those two combine!
For a newbie turner, the wood choice made this a challenging turn. It forced me to get real good real quick at sharpening chisels as this wood was not at all forgiving with a dull chisel, and would rip out if the chisel needed sharpening. My one regret is that I wish I had taken more time to try to smooth the head of the mallet and do a better job sanding. There are some scratches on the head portion that didn’t become visible until I applied the finish. Since this is a shop project, and the head is going to get abused anyway, I didn’t worry about it, and moved on. The finish on it is, again, boiled linseed oil, with many coats of shellac sanded to 800 grit. Overall, I am really happy with the piece, and have had two family members try to talk me out of using it for its intended purpose. The final weigh-in for this mallet was just shy of 20 oz!
Turnings 3, 4, & 5 – Marking Knives
Published on by Mike (2 Comments)
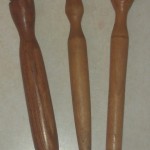
 I am getting ready to take a class at my local Woodcraft to learn to how to make hand cut dovetails. Most of the tool requirements listed I already owned. One of the exceptions was a marking knife. I decided to give it a try at making one. I bought a couple pen blanks of Brazilian Cherry as I really liked how the finish came out on the hand plane tote and knob. Alas the first attempt at the first knife ended in disaster. When I went to drill the hole for the blade tang, the piece split all the way down. Bummer! So I started over, and once I got the handle turned, I drilled progressively larger until I got to the size hole needed. After epoxying in the blade and playing around with it, I realized the blade was too short and way too wide to be practical for marking dovetail cut lines. I decided to try again, but this time used some scrap cherry left over from the chisel rack. This is a much narrower handle, for a much narrower and longer blade. This should be much better suited for cutting dovetails. The last one was made as I had made an experimental blade before doing anything for real. Even the it is beveled for a lefty and I am right handed (oops) I decided to make one more handle for this one.
Also, I made the blades from a demolition reciprocating saw blade, which is about 1/16″ thick piece of metal. I used my Dremel to cut the metal, and grind and belt sander to do the shaping and beveling. I then sharpened them like I would any other blade.
Turning #2 – Hand Plane Knob
Published on by Mike (Leave a comment)
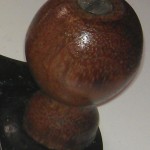
 This was for a plane restore that I discuss in an earlier blog post, which can be found here. I actually bought a bowl turning blank that if I recall correctly was a 6″x6″x2″ piece of Brazilian Cherry. The purpose of using a big piece like that was so I could get both the tote and knob from the same piece of wood. I cut a 2″x2″x6″ piece with my band saw. Had I done this today, I would have cut that piece in half for another turning project. But I still was real confident about getting the sizing right so I used the hole piece. The finish on this is boiled linseed oil and several coats of shellac. I was MUCH happier with the finish on this piece then I was on the last one.
