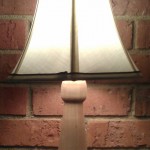
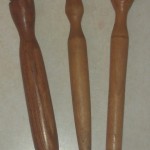
 The lamp is yet another turning as my lathe addiction grows. 🙂 This was a challenging, but fun project. There are actually three turnings total for this project. The first is the main body, the next one is the base, and finally a small turning that is used to attach the electrical components. All components were made from maple that has some (but not much) ambrosia figure in it. The finish is boiled linseed oil and a furniture paste wax.
The lamp’s main body was made for four 3/4″ boards laminated together. The two middle boards had a groove routed down the middle of them stopping an inch from each end. The idea being that after turning the main body, that I could drill a hole from either end that would allow the wire to run through, and attach the electrical components. The BIG mistake I made was I didn’t mark on the boards where the grooves were so that I could see where they were. I just assumed they would stay center enough for this. However, after glueing up the four boards, then jointing the edges, as well as trimming the ends, some how those groves became off center. Not enough to ruin the final turning, but just enough that they weren’t useable. Luckily I was able to find a drill bit that I already had that was long enough to meet in the middle, and was able to finish the drilling on the drill press.
The base of the lamp was turned from a rough 4/4 piece of maple. I flattened it on one face with the jointer, then straightened one edge. I wasn’t concern about squaring up the piece, just so I had a good edge to cut it to length on the miter saw and attach to the face plate. I roughed out the round pattern on the bandsaw. Once on the lathe, it was no problem getting the piece perfectly round and getting the face opposite to the faceplate parallel. Since this was a flat piece, with grain running perpendicular to the lathe, using spindle gouges was out of the question. The only turning tool I was able to use for this was my scraper. The main body had a large tenon, so I drilled mortise into the the base to accept the main body. Then I drilled a hole through the side of the base to allow for the electrical wire.
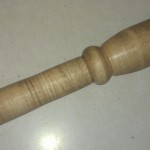
The hole at the top (and bottom for that matter) of the lamp body was 5/8″ in diameter. I needed a reducer peg so that I could put a threaded nipple into it. So I turned one to 5/8″ then drilled a hole just over a 3/8″ in diameter. The 5/8″ main hole was big enough to allow the nut and washer to fit, so it made attaching the threaded nipple a breeze. Before I glued in the reducer peg I attached the nipple to it. I SHOULD have ran the electrical wire through it first, as it would have been much easier to get pushed through. I didn’t but after a bit of rigging, I was able to get the wire pulled through.
The electrical components were for the most part were taken from an old lamp that was falling apart, though I had to buy a couple pieces from Lowes. The lampshade was bought from Target.
My wife is delighted to have it now. The room we have it was always a dark room because of the large brick wall for the fireplace. Having the additional light in the room makes a big difference for the overall lighting in the room.


