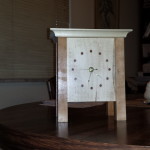
Mantel Clock – Design Reflection

Published on by Mike  (Leave a comment)

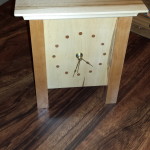
2013-10-20 16.33.45   The clock was an experiment for me.  Some of my earliest projects, I never used any sort of plans, except for maybe a quick drawing on paper.  The projects were either extremely simple…..or just didn’t end as well as I expected.  What really helped me increase the quality of my projects is drawing them up before hand with sketchup, and every major project I have done for the past 3 years I have made a drawing for.  During this time, I like to think I have become a better woodworker by pushing my limits when I can.  This project, I pushed my limits by using no design whatsoever, not even a napkin drawing.  I did take inspiration from photos, and some help from my wife.
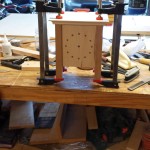
2013-10-13 16.01.51Part of the design challenge was also having elements in it that allowed me to use new techniques that I have not tried before.  This turned out to be resawing on the band saw to make the 1/4″ thick panels.

As for the design itself, after I laid out and drilled the holes for the face, I was concerned I made the face too big for the clock.  Looking at the finished product now, especially since I simplified the top, I am happy with the size.  2013-10-12 13.25.49The one thing I would change on the design is the columns.  I think I would have liked slightly thicker columns so that I could have made the tapers more pronounced.  Even an 1/8″ thicker I think would have made a big difference.  The top was a tough one.  My vision was originally to make it much more ornate.  However, once I got the first layer on the clock, I really liked the cleaner look of the flat top, so I stayed with it.  The only other thing I would have changed, is the back.  My scroll sawing experience is still very small, and I wish I could have made the cuts a bit more straight.
2013-10-06 16.10.56Overall, I feel this experiment was successful.  I like how it looks sitting on our mantel, and the feedback I have gotten has been very positive.  Also I did enter it into my local Woodcraft’s gallery, in the small projects division.  I am happy to report, that the clock took third place in that division!  Will see what I come up with for next year’s gallery!  🙂

Mantel Clock – The Finish

Published on by Mike  (2 Comments)

2013-10-20 16.33.31I normally like the formula of boiled linseed oil and shellac for my projects.  I really like the richness that the boiled linseed oil brings to wood.  However, I had two concerns about using the oil on this piece.  The first, is that the oil does darken the wood.  I really wanted the contrast between the cherry and maple.  Part of the my wood selection was going through my ambrosia maple stock that had the lightest color, which can be a challenge as ambrosia maple often has a lot of dark coloring to it.  Shellac by itself still brings out the quality of the wood, but the super blonde I would use wouldn’t darken the maple as drastically as the oil would.  The next issue is we are now officially in fall, and my shop area is not climate controlled.  Boiled Linseed Oil really needs warmer weather for it to cure properly.  I just didn’t think we would have enough warm days in a row to let it fully cure in a timely manner.  So, I made the decision to go with shellac only, which dries quickly, even on a 55 degree day.

2013-10-20 16.33.45For applying the shellac, I used my HVLP setup.  This consists of a conversion gun and a pancake compressor.  While the compressor is woefully undersized for this type of application, it does work when there is nothing else to use.  I ended up spraying about 4 coats, using high grit sand paper to smooth.

Once I the finish was completed, I reattached the hinges, and put together the quartz movement, put a battery in it, and set the time.  It is currently on our mantel.

The next post on the clock I will discuss my thoughts on how the design turned out.  Also, I am seriously considering entering the clock into the local Woodcraft’s annual gallery.  If I do, I may write up a brief post about that as well.

Mantel Clock – Assembly

Published on by Mike  (Leave a comment)

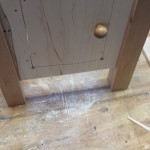
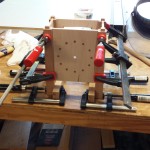
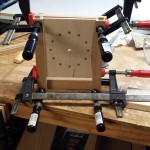
2013-10-12 16.26.34   After completing work on the panels, I turned a knob for the back door, as well as making a closer that utilizes a rare earth magnet to keep it closed.  I also filled the corner holes that I drilled for the scroll saw with cherry pegs, similar to the pegs used for the face.  Once that was completed I started the glue-up2013-10-06 16.10.56 of the panels to the legs. I did the front and back panels to start out with first.  This was so I could use cauls to keep the glue-ups flat and square. After the front and back panels were glued together, I glued the rest of the base together, again using cauls where I could.  Once I got the base out of clamps, I held my breath and set it on a flat surface.  Turned out the prep work I had done really paid off and it sat flat without making any tweaks to the columns!

2013-10-12 13.25.49In the spirit of this project, with no plans or drawings, I still hadn’t come up with a top.  I had thought about a domed top, but didn’t want the clock to follow too closely the clock I used for inspiration.  Inspiration can come from many places, and in the case for the top, it came from my wife.  She gave me a few ideas as to how I could go with it.  I was really toying around with the idea o2013-10-13 16.01.51f doing a multi-layered top.  I then cut out the first piece that would attach to the columns of the base, and cut the mortises for the tenons, and then spent some time on the router table creating a profile.  After a dry fit, I really like how it looked.  So I let it sit for awhile.  It was a tough call as to weather I should go further with it or not.  I showed it to my wife as a dry fit, and she liked it too.  So , realizing that sometimes the most difficult aspect of design is knowing when to stop, I decided, it was time to go with it, and glued it to the base.

Next post I will discuss the finish.


Mantel Clock – The Panels

Published on by Mike  (Leave a comment)

2013-09-18 21.44.49So work has progressed on the mantel clock.  The next step after working on the corner posts was to start working on the panels.  The grooves that I put into the corner posts were for 1/4″ thick panels.  Since the rough stock I have laying around is all 4/4, it would have been extremely wasteful to plane a 4/4 piece down to a 1/4″  thick.  So I decided to go for my first resaw.  I started out by flattening one of the faceson the jointer, the flattened and brought the opposite face to parallel with the planer.  This only took a couple passes on each machine, which left me with a little over 7/8″ thick material, which is plenty to work with.  I then edge jointed one side, and cut the opposite on the table saw.   The work piece was ready for the band saw.  I would like to tell you that I used a 1/2″ or 3/4″ resaw blade on my band saw, but I didn’t.  I didn’t even use a 3/8″ blade.  In face I used the 1/4″ blade that was on the saw.  While a thicker blade would have helped, it is more than possible to resaw with a 1/4″ blade.  The important part is having the blade well tensioned and properly tracking.  I set the rip fence on the band saw so that it got the work piece visually centered, no need for it to be exact at this stage.  The work piece was about 5.5″ wide and about 24″ long.   I then powered up the dust collector and band saw and started the cut.  The push stick and push pad are a must for this operation!  With the safety aspect in consideration, the next important thing, is let the saw work, and not try to push the work piece through too hard or fast.  I was very happy with the results of the resaw, overall it went well.  The next step was to take the now two work pieces back to the planer and smooth down the rough side for each work piece, and then while flip flopping the work pieces get them down to 1/4″.    After getting them to thickness, I cut them to size on the table saw.

A quick note on movement.  Wood this thin, especially after a resaw, will want to move, a LOT.  At the end of each day in the shop, I put the work pieces under some weight.  I am happy to report that this has done very well to keep the work pieces reasonably flat.  There has been some movement, but nothing I cannot work with.

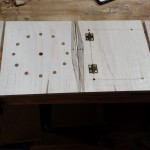
On the work piece I designated as front, I started laying out the clock face.  Once I got the face layed out, I drilled a 1/4″ diameter hole roughly about an 1/8″ deep.  I then turned pegs from the same cherry stock I made the columns from, and the glued them into the holes.  While the glue was drying, the rear panel, I used my scroll saw to cut out a door for access to the clock works.  I am not really happy with the cut, but I think I can work with it.  I pre-installed the hinges for the door so that the spacing would be correct, before fully cutting out the door.
I still have some more work to do on the panels, and will add another update as I progress further.

Mantel Clock – A Free Form Project

Published on by Mike  (Leave a comment)

2013-09-16 21.21.37I like using sketch-up.  I think drawing my projects as a 3-D model has gone a long way in developing my skills as a woodworker.  So the next logical step…..   No drawing at all!  Just a mental image from a magazine project.  The project I am going off of is a mantel clock that was in an issue of Popular Woodworking Magazine.  I am not using any plans, predetermined measurements, guidelines.  At this point, I still have some decisions to make along the way, so I am not completely certain how the end product is going to look.  It could be something fantastic or a total bomb!  Either way, its gonna be fun!

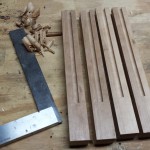
I am using a combination of cherry and maple.  So far, the corners are square tapered columns, made from cherry.  I had gotten some 5/4 cherry, so I was able to get 1″ thick columns.  After testing out some 3/4″ pieces, they just looked to thin, especially since I wanted to taper on two sides.  After I got the columns milled, I determined the length of them.  Then on the table saw I cut tenons on the top of the columns that will eventually be used to attach a top.

The front, back, and sides are going to be 1/4″ thick solid panels that will fit into stopped grooves on the columns.  I used a plunge cut on the router table to create these grooves.  From their I cut the tapers on the sides opposite of the grooves.  The taper is subtle at an 1/8″ in.  I made my own taper jig/sled for these cuts.  In a future blog post I will go into more detail of this jig.  Once the tapers were cut, I used a card scraper to to clean up the cuts.

The next post on this project I will discuss the panels.