Marking Gauges – Shop Made Tools

Published on by Mike  (Leave a comment)

Emm's Marking Gauge 
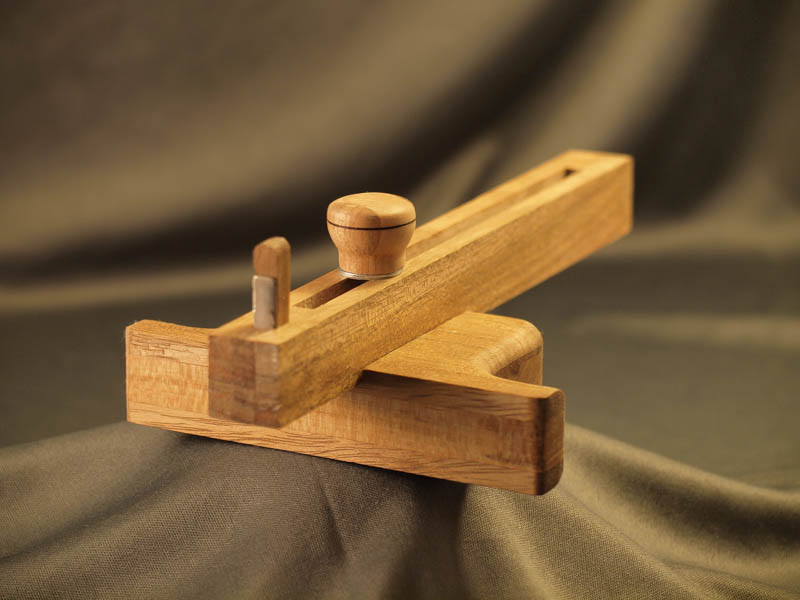
One of the joys I have found with my journey as a woodworker is making my own tools.  A few years ago I turned a mallet that I use all the time.  This is the same mallet that appears in my blog’s logo.  I have also made making knives as well.  One thing I had wanted to try to make is a marking gauge.  After finishing the hand tool cabinet, I took some scraps I had lying around the shop and started planning one out.  In the research I did, I see a lot of people making the “bat” design marking gauge.  While it was an interesting design, I decided it wasn’t for me.  What I came up with is really what I consider a hybrid of a traditional marking gauge and the newer bat design.

marking gauges 2From a tooling point of view, while most of sizing and shaping was done with power tools, the majority of the work was done with hand tools.  In fact the channel for the main bar was made completely with hand tools.  This actually allowed me to get the channel perfectly sized to the sliding bar.  The main face that register to the work piece was then made 90 degrees to the bar by using a smoothing plane.  This also got that face nice and smooth to help it glide along the work piece.  I used a card scraper to get all the remaining surfaces nice and smooth.

Shop Made Tools
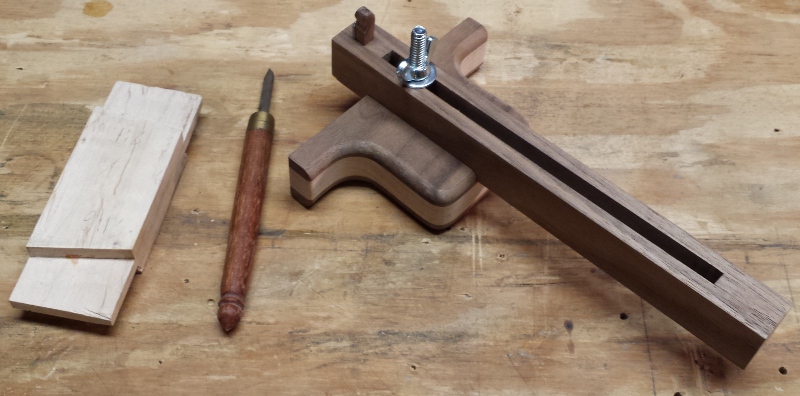
The blade was actually made from a jigsaw blade that I shaped using my bench grinder and dremel tool.  I had noticed that the modern marking gauges had a rounded blade vs.  a straight angled blade on the traditional marking gauge.  I decided to give that design a try.  I found to very positive advantages to that.  First, the rounded blade was easy to make, and fairly easy to sharpen.  Next, this allows the marking gauge to be used in either hand without changing the blade around, and allows the user more freedom on how the marking gauge is held.

first marking guage
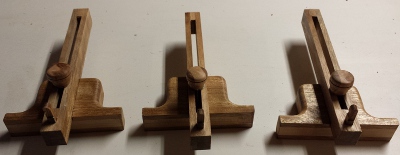
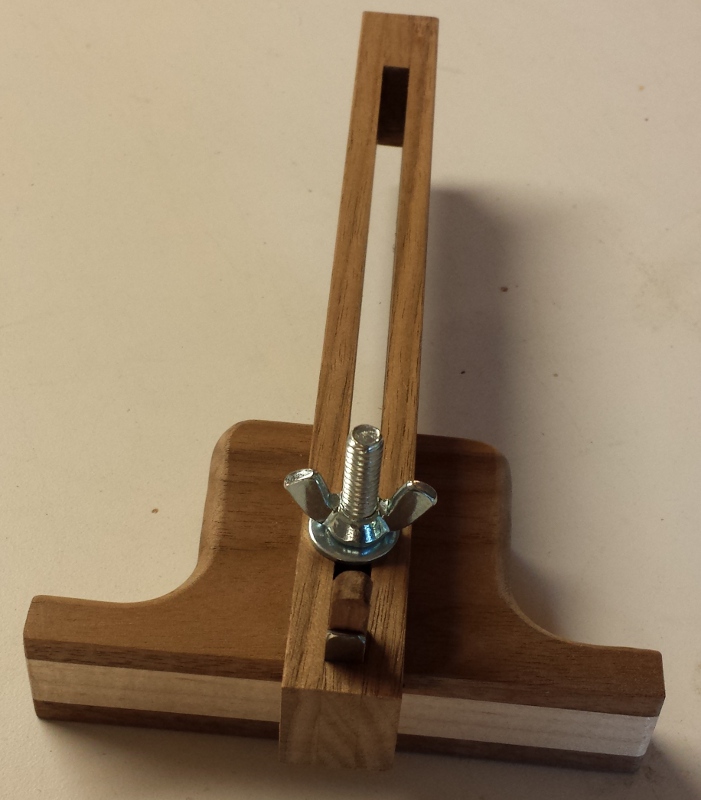
On the first marking gauge I made, I just used a simple wing nut to lock the bar in place. I ended up making several more that I used some of the cutoff scrap from the bodies, and turned them into knobs.  I was a little hesitant at first as I wasn’t sure if a wood knob would be able to lock down tight enough.  But with the first couple experiments I did, I found they did the job very well.  Plus they look a lot better then a wing nut!

This was definitely a fun project to take on.  Plus, it does give me an additional feeling of pride that I put into my work when I use a hand tool that I made with my own hands.

Emm's Marking GaugeA quick note, the first picture was beautifully taken by Karen Mack.  Thank you Karen for allowing me to use this picture!

Easel – Woodworkers Fighting Cancer 2013 Build

Published on by Mike  (Leave a comment)

WoodworkersFightingCancerI have been a little lax on blog posts lately, but I assure you it has been for good reason.  The last couple weeks I have spent my spare time working on an Easel that is this year’s Woodworker’s Fighting Cancer charity build, put on by Marc Spagnoulo of The Wood Whisperer.  Cancer has had a significant impact on my family, so being able to build a project that will benefit those who have cancer, combined with the fact that I sent a nice Christmas gift my nephew is definitely a winner.  Just by building this project and submitting a photo of it, Marc, Steve Ramsey of Woodworking for Mere Mortals, and several other corporations will donate $5 a piece to CancerCare, and will for anyone else who builds an Easel.

Easel BlackboardI had to work somewhat quick to get this done, hence the reason for the lack of a blog post for the past couple weeks.  My nephew lives 8 hours away from there, and my dad is spending the winter with my sister and her family, which he left just before Thanksgiving.  So, to get it down to them in time, I had to get the easel completely finished before he left so I could get it down to them.

Easel Side 1For the most part, I followed the plans fairly close that were provided from Wood magazine for the build.  As Marc showed in his video, I used pre-made panels for the chalkboard and whiteboard rather than paint melamine with the respective paints to get that surface.  I also made it so that tools were not required to put the easel together and take it apart.  I put pegs in the frames with cutouts on the tray that fit into the pegs.   This worked out well with the easel being very solid once assembled.  The wood used was ash, and the finish was shellac.

Easel WhiteboardThis was a fun project to make, and with the deadline for this build being Dec 9th, there is still plenty of time for you to make one as well!

Mantel Clock – Design Reflection

Published on by Mike  (Leave a comment)

2013-10-20 16.33.45   The clock was an experiment for me.  Some of my earliest projects, I never used any sort of plans, except for maybe a quick drawing on paper.  The projects were either extremely simple…..or just didn’t end as well as I expected.  What really helped me increase the quality of my projects is drawing them up before hand with sketchup, and every major project I have done for the past 3 years I have made a drawing for.  During this time, I like to think I have become a better woodworker by pushing my limits when I can.  This project, I pushed my limits by using no design whatsoever, not even a napkin drawing.  I did take inspiration from photos, and some help from my wife.

2013-10-13 16.01.51Part of the design challenge was also having elements in it that allowed me to use new techniques that I have not tried before.  This turned out to be resawing on the band saw to make the 1/4″ thick panels.

As for the design itself, after I laid out and drilled the holes for the face, I was concerned I made the face too big for the clock.  Looking at the finished product now, especially since I simplified the top, I am happy with the size.  2013-10-12 13.25.49The one thing I would change on the design is the columns.  I think I would have liked slightly thicker columns so that I could have made the tapers more pronounced.  Even an 1/8″ thicker I think would have made a big difference.  The top was a tough one.  My vision was originally to make it much more ornate.  However, once I got the first layer on the clock, I really liked the cleaner look of the flat top, so I stayed with it.  The only other thing I would have changed, is the back.  My scroll sawing experience is still very small, and I wish I could have made the cuts a bit more straight.

2013-10-06 16.10.56Overall, I feel this experiment was successful.  I like how it looks sitting on our mantel, and the feedback I have gotten has been very positive.  Also I did enter it into my local Woodcraft’s gallery, in the small projects division.  I am happy to report, that the clock took third place in that division!  Will see what I come up with for next year’s gallery!  🙂

Mantel Clock – The Finish

Published on by Mike  (2 Comments)

2013-10-20 16.33.31I normally like the formula of boiled linseed oil and shellac for my projects.  I really like the richness that the boiled linseed oil brings to wood.  However, I had two concerns about using the oil on this piece.  The first, is that the oil does darken the wood.  I really wanted the contrast between the cherry and maple.  Part of the my wood selection was going through my ambrosia maple stock that had the lightest color, which can be a challenge as ambrosia maple often has a lot of dark coloring to it.  Shellac by itself still brings out the quality of the wood, but the super blonde I would use wouldn’t darken the maple as drastically as the oil would.  The next issue is we are now officially in fall, and my shop area is not climate controlled.  Boiled Linseed Oil really needs warmer weather for it to cure properly.  I just didn’t think we would have enough warm days in a row to let it fully cure in a timely manner.  So, I made the decision to go with shellac only, which dries quickly, even on a 55 degree day.

2013-10-20 16.33.45For applying the shellac, I used my HVLP setup.  This consists of a conversion gun and a pancake compressor.  While the compressor is woefully undersized for this type of application, it does work when there is nothing else to use.  I ended up spraying about 4 coats, using high grit sand paper to smooth.

Once I the finish was completed, I reattached the hinges, and put together the quartz movement, put a battery in it, and set the time.  It is currently on our mantel.

The next post on the clock I will discuss my thoughts on how the design turned out.  Also, I am seriously considering entering the clock into the local Woodcraft’s annual gallery.  If I do, I may write up a brief post about that as well.

Mantel Clock – Assembly

Published on by Mike  (Leave a comment)

2013-10-12 16.26.34   After completing work on the panels, I turned a knob for the back door, as well as making a closer that utilizes a rare earth magnet to keep it closed.  I also filled the corner holes that I drilled for the scroll saw with cherry pegs, similar to the pegs used for the face.  Once that was completed I started the glue-up2013-10-06 16.10.56 of the panels to the legs. I did the front and back panels to start out with first.  This was so I could use cauls to keep the glue-ups flat and square. After the front and back panels were glued together, I glued the rest of the base together, again using cauls where I could.  Once I got the base out of clamps, I held my breath and set it on a flat surface.  Turned out the prep work I had done really paid off and it sat flat without making any tweaks to the columns!

2013-10-12 13.25.49In the spirit of this project, with no plans or drawings, I still hadn’t come up with a top.  I had thought about a domed top, but didn’t want the clock to follow too closely the clock I used for inspiration.  Inspiration can come from many places, and in the case for the top, it came from my wife.  She gave me a few ideas as to how I could go with it.  I was really toying around with the idea o2013-10-13 16.01.51f doing a multi-layered top.  I then cut out the first piece that would attach to the columns of the base, and cut the mortises for the tenons, and then spent some time on the router table creating a profile.  After a dry fit, I really like how it looked.  So I let it sit for awhile.  It was a tough call as to weather I should go further with it or not.  I showed it to my wife as a dry fit, and she liked it too.  So , realizing that sometimes the most difficult aspect of design is knowing when to stop, I decided, it was time to go with it, and glued it to the base.

Next post I will discuss the finish.