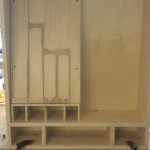
Mantel Clock – The Panels

Published on by Mike  (Leave a comment)

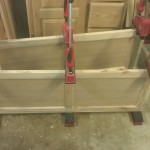
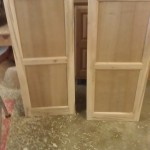
2013-09-18 21.44.49So work has progressed on the mantel clock.  The next step after working on the corner posts was to start working on the panels.  The grooves that I put into the corner posts were for 1/4″ thick panels.  Since the rough stock I have laying around is all 4/4, it would have been extremely wasteful to plane a 4/4 piece down to a 1/4″  thick.  So I decided to go for my first resaw.  I started out by flattening one of the faceson the jointer, the flattened and brought the opposite face to parallel with the planer.  This only took a couple passes on each machine, which left me with a little over 7/8″ thick material, which is plenty to work with.  I then edge jointed one side, and cut the opposite on the table saw.   The work piece was ready for the band saw.  I would like to tell you that I used a 1/2″ or 3/4″ resaw blade on my band saw, but I didn’t.  I didn’t even use a 3/8″ blade.  In face I used the 1/4″ blade that was on the saw.  While a thicker blade would have helped, it is more than possible to resaw with a 1/4″ blade.  The important part is having the blade well tensioned and properly tracking.  I set the rip fence on the band saw so that it got the work piece visually centered, no need for it to be exact at this stage.  The work piece was about 5.5″ wide and about 24″ long.   I then powered up the dust collector and band saw and started the cut.  The push stick and push pad are a must for this operation!  With the safety aspect in consideration, the next important thing, is let the saw work, and not try to push the work piece through too hard or fast.  I was very happy with the results of the resaw, overall it went well.  The next step was to take the now two work pieces back to the planer and smooth down the rough side for each work piece, and then while flip flopping the work pieces get them down to 1/4″.    After getting them to thickness, I cut them to size on the table saw.

A quick note on movement.  Wood this thin, especially after a resaw, will want to move, a LOT.  At the end of each day in the shop, I put the work pieces under some weight.  I am happy to report that this has done very well to keep the work pieces reasonably flat.  There has been some movement, but nothing I cannot work with.

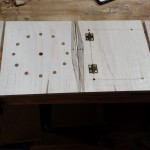
On the work piece I designated as front, I started laying out the clock face.  Once I got the face layed out, I drilled a 1/4″ diameter hole roughly about an 1/8″ deep.  I then turned pegs from the same cherry stock I made the columns from, and the glued them into the holes.  While the glue was drying, the rear panel, I used my scroll saw to cut out a door for access to the clock works.  I am not really happy with the cut, but I think I can work with it.  I pre-installed the hinges for the door so that the spacing would be correct, before fully cutting out the door.
I still have some more work to do on the panels, and will add another update as I progress further.

Mantel Clock – A Free Form Project

Published on by Mike  (Leave a comment)

2013-09-16 21.21.37I like using sketch-up.  I think drawing my projects as a 3-D model has gone a long way in developing my skills as a woodworker.  So the next logical step…..   No drawing at all!  Just a mental image from a magazine project.  The project I am going off of is a mantel clock that was in an issue of Popular Woodworking Magazine.  I am not using any plans, predetermined measurements, guidelines.  At this point, I still have some decisions to make along the way, so I am not completely certain how the end product is going to look.  It could be something fantastic or a total bomb!  Either way, its gonna be fun!

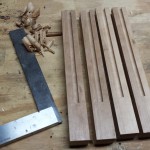
I am using a combination of cherry and maple.  So far, the corners are square tapered columns, made from cherry.  I had gotten some 5/4 cherry, so I was able to get 1″ thick columns.  After testing out some 3/4″ pieces, they just looked to thin, especially since I wanted to taper on two sides.  After I got the columns milled, I determined the length of them.  Then on the table saw I cut tenons on the top of the columns that will eventually be used to attach a top.

The front, back, and sides are going to be 1/4″ thick solid panels that will fit into stopped grooves on the columns.  I used a plunge cut on the router table to create these grooves.  From their I cut the tapers on the sides opposite of the grooves.  The taper is subtle at an 1/8″ in.  I made my own taper jig/sled for these cuts.  In a future blog post I will go into more detail of this jig.  Once the tapers were cut, I used a card scraper to to clean up the cuts.

The next post on this project I will discuss the panels.

Keeks of the hand tool cabinet

Published on by Mike  (Leave a comment)

Since there aren’t really any keek plugins for word press yet, I decided to start embedding my keeks into my blog as appropriate.  To get caught up real quick, I thought I would post the keeks related to the hand tool cabinet.

Jun 16, 2013 | First Keek! Quick tour of the hand tool cabinet. by mikemader on Keek.com

Jun 16, 2013 | card scraper till done! by mikemader on Keek.com

Jun 19, 2013 | Most of my hand tools in the cabinet. Not sure if what to do with the saws yet by mikemader on Keek.com

Jun 20, 2013 | Saws finally hung. All tools in the cabinet! by mikemader on Keek.com

Evolution of my shop

Published on by Mike  (2 Comments)

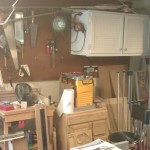
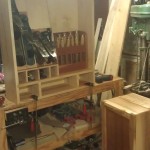
2013-06-08 16.06.27Yes, I know, my posts drop off when I am working out in the shop.  However, the time between my last post and this one has not gone to waste!  There have been quite a few changes in the shop!  Every shop is a constantly changing environment.  When we first moved into this house, most of my tools were small and portable, and I would take them out to the driveway and work.  Most of the projects I undertook then were home improvement/repair related, and a few other smaller woodworking projects which were well perforated with brad nails.  (Sorry Norm)  The white cabinet on the wall I made for power hand tools, and really was the first storage towards my shop.  It was perfect for that use, and was on the wall for quite a few years.  Everything else I had was well stored on the peg board around it.  However, as my interest in woodworking grew, and my projects became more sophisticated, my tool needs changed, and therefore my storage needs changed.  Now if you told be 3 years ago that I would have a hand tool collection beyond a set of chisels, I would have laughed.  However, that soon changed, and my hand tools started growing.  Quickly.  🙂  So that is how and why the hand tool cabinet project began.  Other storage needs had also cropped up besides hand tools.  Last year I started buying clamps.  Real clamps.  Not the junk i had bought from a discount store a few years ago.  In fact I have started buying Bessey Revos and Bessey F-clamps.  The nice thing about the Revos, they do stand up on their own.  However, they do take up a lot of floor space, and honestly, I have knocked them over more then I care to admit.  So, wall storage was needed as well.

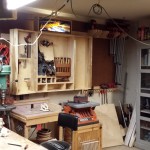
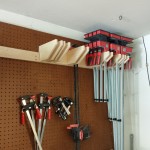
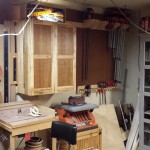
2013-06-24 23.08.322013-06-22 14.58.54So, now the hand tool cabinet is up on the wall, and my still growing collection of hand tools are stowed away in it.  Each tool, that didn’t end up on the plane till or in the chisel rack all had custom hangers made for them.  I eventually want to put a saw till in the right door, but with just the one dovetail saw and the one Japanese saw, I decided to leave that for a later project.   I still need to make the drawers for the cabinet, but those will come later as well.  I also made two clamp racks.  The first one is for the k-bodies.  If you notice, it is intentionally only half full.  I am not buying those clamps yet.  🙂  I also made a rack down lower for my smaller clamps, including the F-Style clamps.

2013-06-24 23.08.05I dare not call the hand tool cabinet finished.  I don’t think I will ever call it finished, as it is meant to grow and change as  I do in my woodworking.  So don’t be surprised if 5 years from now if I still make the occasional update on it.  For now, on to the next project!

Oh, and the white cabinet did not go to waste.  My Dad took it, and is going to use it in his garage.

Hand Tool Cabinet – Lots of progress

Published on by Mike  (Leave a comment)

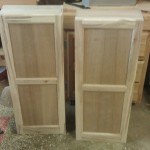
2013-05-17 18.33.48After completing the door boxes, I started working on the false fronts.  The false fronts are actually serving 2 purposes.  The first is to make the cabinet look nice when the doors are closed.  The second is to hide any potential screw or nail penetration.  2013-05-25 17.39.50The back of the door boxes is 1/2″ baltic birch ply and is meant for me to hang tools off of.  So, it is very possible a screw may poke through, which the false fronts will hide that.  The false fronts are made with a frame and panel design, using an ogee style router bit set.  The panels themselves are cherry plywood that I had left over from the cradle.  This adds a nice contrast to the ambrosia maple from the rest of the cabinet.

2013-05-25 17.39.58Once I had those completed, I readied the table saw to cut a rabbet around the entire perimeter of the fronts so that they would fit into cavity left for them in the door boxes.   After getting getting it setup and making a few test cuts, I decided to not do the rabbets.  The reason being is I realized this was going to look funky where you could see the joinery.  While it was not going to be that obvious, I felt it was still an issue.  Using some thin pieces of scrap, I attached them to the underside of the fronts to use to line them up.  I applied the glue and clamped them up.  I made the fronts over-sized to the door boxes so that there was an 1/8″ overhang on all sides.  I then used a flush-trim bit to flush everything up.

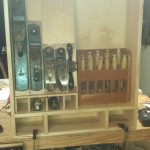
2013-06-01 21.18.39After getting that all done, I had a lot of sanding to do.  Therefore, I procrastinated.  🙂  I ended up working on the plane till to go inside the cabinet.  This was another design change from the sketchup.  The original design wasn’t really well thought out, and consisted of vertical slots for the planes, with no real  thought into keeping them in place.  I decided to go with one at an angle 2013-05-27 15.19.34that the weight of the plane would help hold it in place.  The back of the till is 1/2″ baltic birch ply screwed (yes screws) on to a couple rails to hold it in place.  I then proceed to make shaped spaces for each plane to sit in.  With the tight fit in the till, and the angle they are sitting at, they are secured in place.  I later even worked in a place for the spoke shave.  Right now I am working on figuring out where the router plane will go.

2013-06-01 21.18.29Finally I completed the sanding.  Sanding was, well it was sanding, and a lot of it.  I then decided it was time to proceed with the finish.  I covered everything, except the back of the main cabinet with boiled linseed oil.  After giving the oil a few days to cure, I sprayed the exterior portions (except the back) and wiped on the edges of the interior.  I decided it would probably be best not to shellac the interiors of cabinet and door boxes.  I was concerned that this would create some barriers down the road.

So, what’s left?  I need to get the piano hinges purchased and installed on the doors.  I then need to complete making the french cleats and the upper portion installed on the back of the cabinet.  Then the wall it is going on needs to be cleared off and the french cleat installed on that.  Then, I start loading it!  As I make further updates here on the blog as I make more progress.